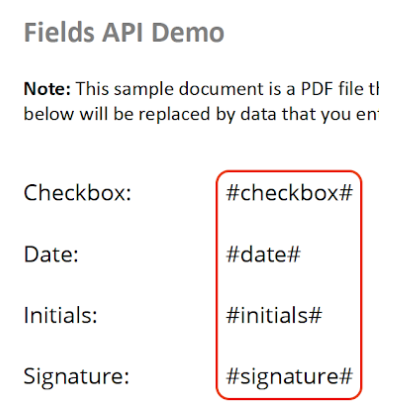
 and uses placeholders that look like #this#, a text string beginning and ending with a pound sign.
- Run the
npm initcommand (accepting all the default options) in a terminal to create a new node project. - Run the
npm installnode-fetch command to download the node-fetch package.
- Toward the end of the file, on the last line in the root object, add the following line to configure this project to use JavaScript modules.
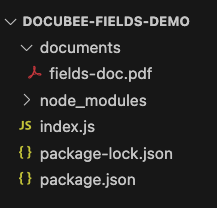
import fetch from 'node-fetch';
import { readFileSync } from 'fs';

const docubeeUrl = 'https://docubee.app';
const apiToken = '';
documentId which represents a document uploaded into the Docubee system. You’ll get that by using the Documents - Upload API.const uploadDocument = async (pathToFile) => {
const response = await fetch(`https://docubee.app/api/v2/documents`, {
body: readFileSync(pathToFile),
headers: {
Authorization: apiToken,
'Content-Type': 'application/pdf'
},
method: 'POST'
});
const { documentId } = await response.json();
return documentId;
}
The uploadDocument() function takes a file path as it’s parameter, and makes a call to the Docubee API to upload the document at the file path into Docubee. It returns a documentId, which you’ll need to use the Fields API.documentId and place fields on the document’s placeholders. Add the following code in index.js:
const placeFieldsOnDocument = async (inputDocumentId) => {
     const response = await fetch(`${docubeeUrl}/api/v2/documents/${inputDocumentId}/fields`, {
         body: JSON.stringify({
             fields: [
                 {
                     anchorString: '#checkbox#',
                     name: 'TestCheckbox',
                     removeAnchorString: true,
                     required: true,
                     type: 'checkbox'
                 },
                 {
                     anchorString: '#date#',
                     name: 'TestDate',
                     removeAnchorString: true,
                     required: true,
                     type: 'date'
                 },
                 {
                     anchorString: '#initials#',
                     name: 'TestInitials',
                     removeAnchorString: true,
                     required: true,
                     type: 'initials'
                 },
                 {
                     anchorString: '#signature#',
                     name: 'TestSignature',
                     removeAnchorString: true,
                     required: true,
                     type: 'signature'
                 }
             ]
         }),
         headers: {
             Authorization: apiToken,
             'Content-Type': 'application/json'
         },
         method: 'PUT'
     });

     const { documentId } = await response.json();

     return documentId;
 }
The placeFieldsOnDocument() function takes the inputDocumentId which represents the documentId returned from your Documents - Upload API call. The body of the Fields API is an array of objects where each object represents a text string that will be replaced by your fields throughout the document.
There are 5 supported field types you can configure in the body of the request: checkbox, date, initials, signature, and text.
Each field type has configuration settings that allows you to tune how they are presented. The value of the anchorString is the placeholder text that will be replaced. If multiple instances of the anchor string are found in the document, the specified field type will be applied for each. See Documents - Fields for more information on how to configure the Fields API request body.(async () => {
const inputDocId = await uploadDocument('./documents/fields-doc.pdf');
console.log(`inputDocId: ${inputDocId}`);
const fieldsDocId = await placeFieldsOnDocument(inputDocId);
console.log(`fieldsDocId: ${fieldsDocId}`);
})();
Here, you call an anonymous function that calls your two functions you defined earlier in steps 9-11. We print out the documentId returned from each; they should be exactly the same. This is because we reuse the document reference after we process and apply the fields to it with the Fields API.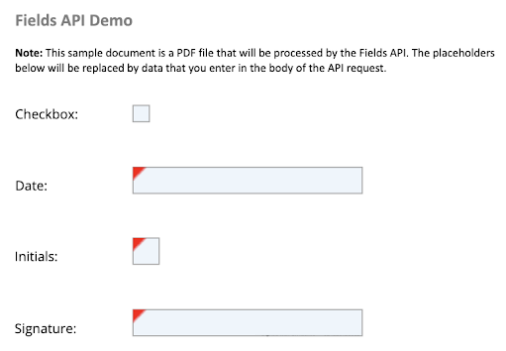 In the fill & sign task, the user will be able to interact and enter data into the fields. They can check the checkbox, pick a date, enter text, and sign the fields that you replaced with the Fields API.