- Create a new directory on your desktop and name it docubee-api-demo.
- Open this directory in Visual Studio Code (or your IDE of choice).
- In a terminal:
- Run the npm init command (accepting all the default options) to create a new node project.
- Run the npm install node-fetch command to download the node-fetch package.
- Within the docubee-api-demo directory:
- Create a new file and name it index.js.
- Create a subdirectory and name it documents.
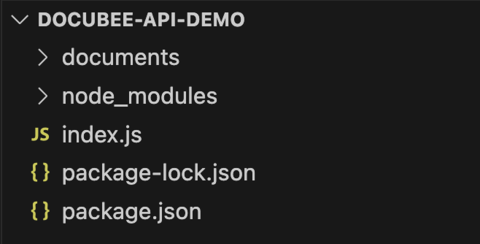
Your directory structure should now look like this:

- Open index.js and add the following code. Replace the apiToken placeholder with your API token.
const fetch = require('node-fetch');
const fs = require('fs');

const docubeeUrl = 'https://docubee.app';
const templateName = 'API Demo';
const apiToken = '<YOUR-API-TOKEN>';
- You can get the templateId programmatically using the Workflows – List Workflows API call and parsing the response body for the templateId.
Add the following function to accomplish it:
const getTemplateId = async () => {
  // List Workflow Templates - https:docs.docubee.app/#list-workflows
  const response = await fetch(`${docubeeUrl}/api/v2/workflowTemplates`, {
    method: 'GET',
    headers: {
      Authorization: apiToken
    }
  });

  const { templateId } = (await response.json()).find(({ name }) => name === templateName);
return templateId;
}
The API request to list the available workflows will return the first workflow that matches the given name. If multiple WFs have the same name only the first will be returned, and the others will be ignored.
You need to parse the workflow data to return the templateId of the workflow that matches the name of the workflow that you set in step #3.
- Create a function for the Workflows – Start Workflow API call to start an instance of the workflow you created earlier.
The body of the API request will contain the properties that you created on the start form. Add the following function to accomplish it.
const startWorkflow = async (templateId) => {
  // Start Workflow - https://docs.docubee.app/#start-workflow
  const response = await fetch(`${docubeeUrl}/api/v2/workflowTemplates/${templateId}`, {
    method: 'POST',
    headers: {
      Authorization: apiToken,
      'Content-Type': 'application/json'
  },
  body: JSON.stringify({
    User_Name: '<YOUR-USER-NAME>',
    User_Email: '<YOUR-EMAIL-ADDRESS>'
  })
});

const { instanceId } = await response.json();

return instanceId;
}
The body of our request includes two parts, “User_Name” and “User_Email”, with their corresponding values being a name and an email address. The keys must match the property names of the fields on the start form.
Enter your name in the <YOUR-USER-NAME> placeholder and your email address in the <YOUR-EMAIL-ADDRESS> placeholder.
The User_Email value is where the email from our workflow will be sent. When you send the Start Workflow request, this email address will receive an email with a link to continue the workflow in the browser.
- To call the functions, add the following code.
(async) () => {
  const templateId = await getTemplateId();

  const instanceId = await startWorkflow(templateId);

  console.log(instanceId);
})();
Here’s how your index.js file should look:
const fetch = require('node-fetch');
const fs = require('fs');

const docubeeUrl = 'https://docubee.app';
const templateName = 'API Demo';
const apiToken = '<YOUR-API-TOKEN>';

const getTemplateId = async () => {
  // List Workflow Templates - https:docs.docubee.app/#list-workflows
  const response = await fetch (`${docubeeUrl}/api/v2/workflowTemplates`, {
    method: 'GET',
    headers: {
      Authorization: apiToken
    }
  });

  const { templateId } = (await response.json()).find(({ name }) => name === templateName);

  return templateId;
}

const startWorkflow = async (templateId) => {
  // Start Workflow - https://docs.docubee.app/#start-workflow
  const  response = await fetch(`${docubeeUrl}/api/v2/workflowTemplates/${templateId}`, {
    method: 'POST',
    headers: {
      Authorization: apiToken,
      'Content-Type': 'application/json'
     },
     body: JSON.stringify({
       User_Name: '<YOUR-USER-NAME>',
       User_Email: '<YOUR-EMAIL-ADDRESS>'
     })
  });

  const { instanceId } = await response.json();

  return instanceId;
}

(async () => {
  const templateId = await getTemplateId();

  const instanceId = await startWorkflow(templateId);

  console.log(instanceId);
})();
- To start your demo application, run node index.js in your terminal.
- The instanceId, the unique identifier for a workflow instance, will print to the console. You’ll use it in later requests to get instance properties (so copy and paste it in a text editor for now).
- You should also see that a new email has been sent to your email address from Docubee.
- After sending our Start Workflow request and receiving an email, you should now go to your email inbox and follow the VIEW TASK link in the email to continue to Docubee.
- In Docubee, within the web form task, you will see 5 fields.
- The first two fields are read-only and contain the data you entered with the API, and the other three need to be completed now.
- Enter your text and date, upload a document, and then press Continue.
- When you see the Complete Workflow screen, you can either leave the page or close the browser window.
- Now that the workflow has been completed in Docubee, let’s use the API to retrieve the values of the fields you entered during the workflow runtime.
Use the Workflow Instances – List Instance Properties API and the request should look like this:
const instanceProperties = await (await fetch(`${docubeeUrl}/api/v2/instances/${instanceId}/properties`, {
  method: 'GET',
  headers: {
    Authorization: apiToken
  }
})).json();
The instance Id is the value you returned from step #6. The response from the request looks like this:
{
  properties: {
    User_Email: 'JohnDoe@docubee.app',
    User_Name: 'John Doe',
    Todays_Date: '2024-06-17T11:15:00',
    User_Favorite_Color: 'Orange'
}
The fields and their values entered during the workflow runtime are listed in an object where each key corresponds to a property name configured in the workflow.
You configured another field in our workflow that isn’t in this response: the document upload.
- To list a workflow instance’s documents, you’ll use the Workflow Instances – List Instance Documents API. The request should look like this:
const instanceDocuments = await (await fetch(`${docubeeUrl}/api/v2/instances/${instanceId}/documents`, {
  method: 'GET',
  headers: {
    Authorization: apiToken
  }
})).json();
which will give you this response:
{
  documents: [
    documentId: '0490bcb1-7274-4bf8-b6c2-d210c317bb04',
    propertyName: 'Document_Upload',
    fileExtension: 'pdf',
    filename: 'creating-wireframes.pdf',
    modifiedDate: '2024-06-17T11:15:00.000Z'
}
The documents array contains an index of an object for each document used in the workflow instance. You can use the documentId from this response to download a document. The Documents – Download API call should look like this:
fs.writeFileSync('./documents/my-docubee-document.pdf', await (await fetch(`${docubeeUrl}/api/v2/documents/${documentId}`, {
  method: 'GET',
  headers: {
    Authorization: apiToken
  }
})).buffer());
If the downloadable file used is something other than a PDF, update the file extension in this code block. We have attached a PDF for you to use in this example.
If you make this call from index.js, then the response, your document file bytes, will write to your docubee-api-demo/documents directory.