Docubee Sign for Salesforce on AppExchange
View our Pricing & Plans for a detailed list and comparison of features available in each plan.
Salesforce is a customer relationship management (CRM) system for managing client data where you will still need to efficiently manage the rest of your contract lifecycle.
Without a contract management app integrated with Salesforce, a lot of time may be spent creating, sending, and following up on contracts. Docubee Sign for Salesforce is a powerful app that enables you to automate the entire contract lifecycle and add eSignatures with full Salesforce integration, streamlining the process and reducing errors. This means your sales team can focus on acquiring new leads, rather than managing contracts.
What is Salesforce AppExchange?
Salesforce AppExchange is an enterprise cloud marketplace where you can integrate the functionality of thousands of great apps and solutions with your Salesforce instance.
Contract Management Using Docubee Sign for Salesforce
Ready to try the Docubee Sign for Salesforce app? Find us on AppExchange and let’s walk through how to set up a document and send it for signature. Let’s start automating!
Send a Contract in Salesforce with Docubee Sign for Salesforce
Installation
To set up your integration of Docubee Sign for Salesforce, follow our installation instructions.
Document Management Panels in Salesforce
Once your installation is complete, three panels will be available in your Salesforce instance.
Note: The document selection and status panels are only compatible with the opportunity object.
In your Salesforce instance:
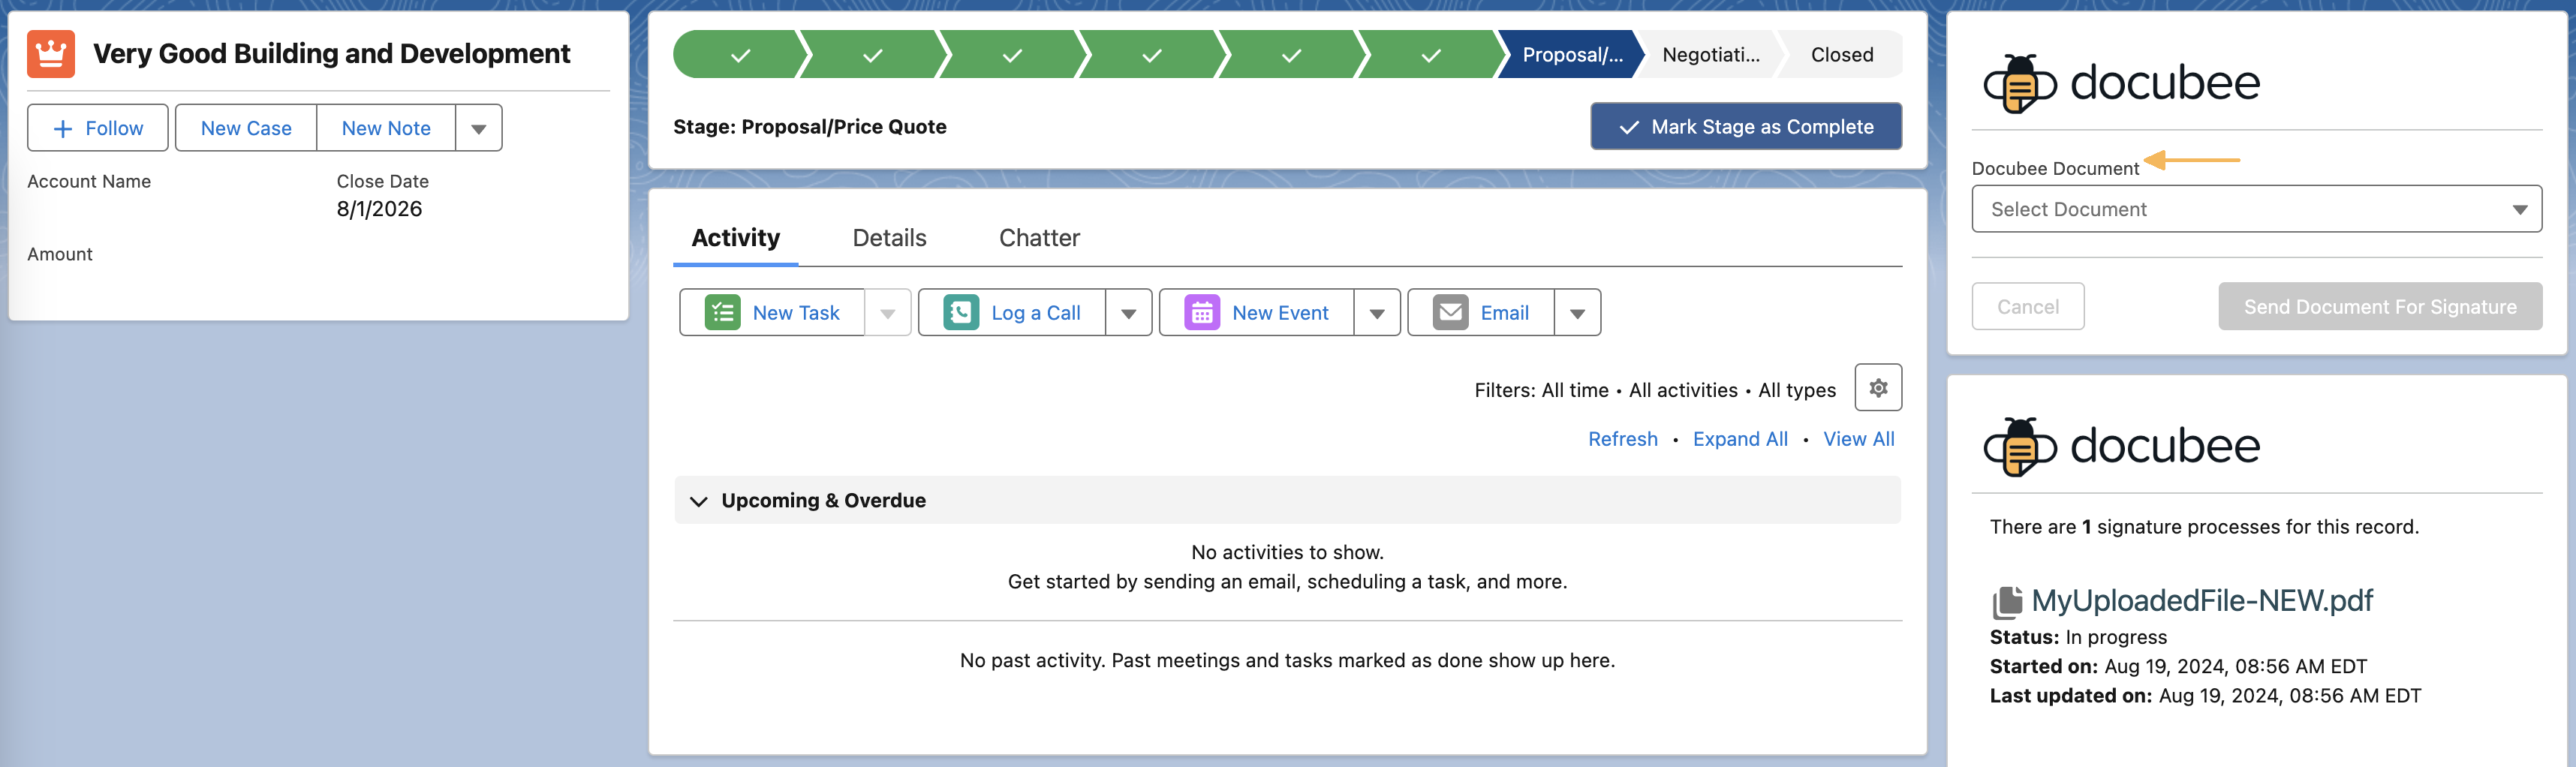
- First is a document panel, titled Docubee Document, where you can select documents to send for signature.

- Next is a document status panel where you can track the progress of documents you’ve already sent for signature. It will display in-progress and completed documents, their status, who signed, and relevant dates.
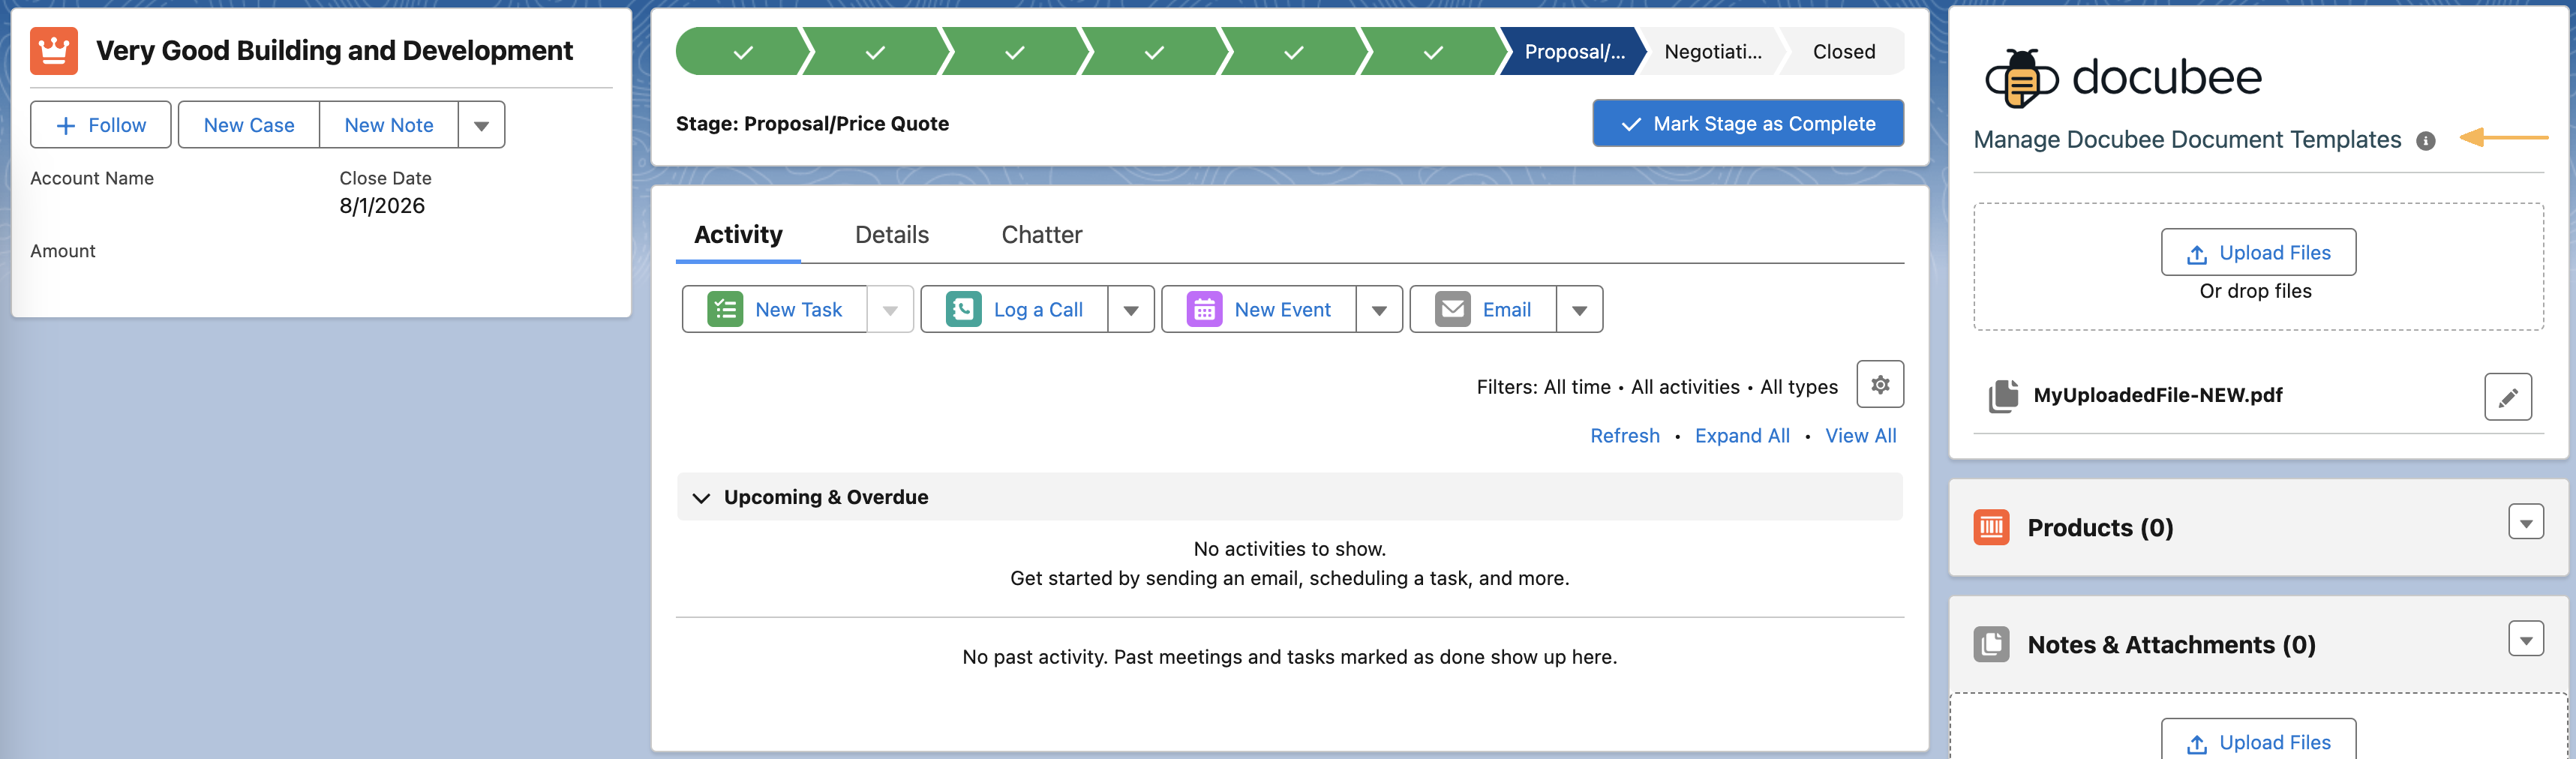
- The last panel is the document management panel, Manage Docubee Document Templates, where you can upload documents and manage their fields. It does not have to be placed on the opportunity object and is compatible as a custom lightning component tab.
Upload Your Document in Docubee Sign for Salesforce
Once you’ve installed the Docubee Sign for Salesforce application:
- Navigate to the Manage Docubee Document Template panel.
- Click the Upload Files button to select a document to use.
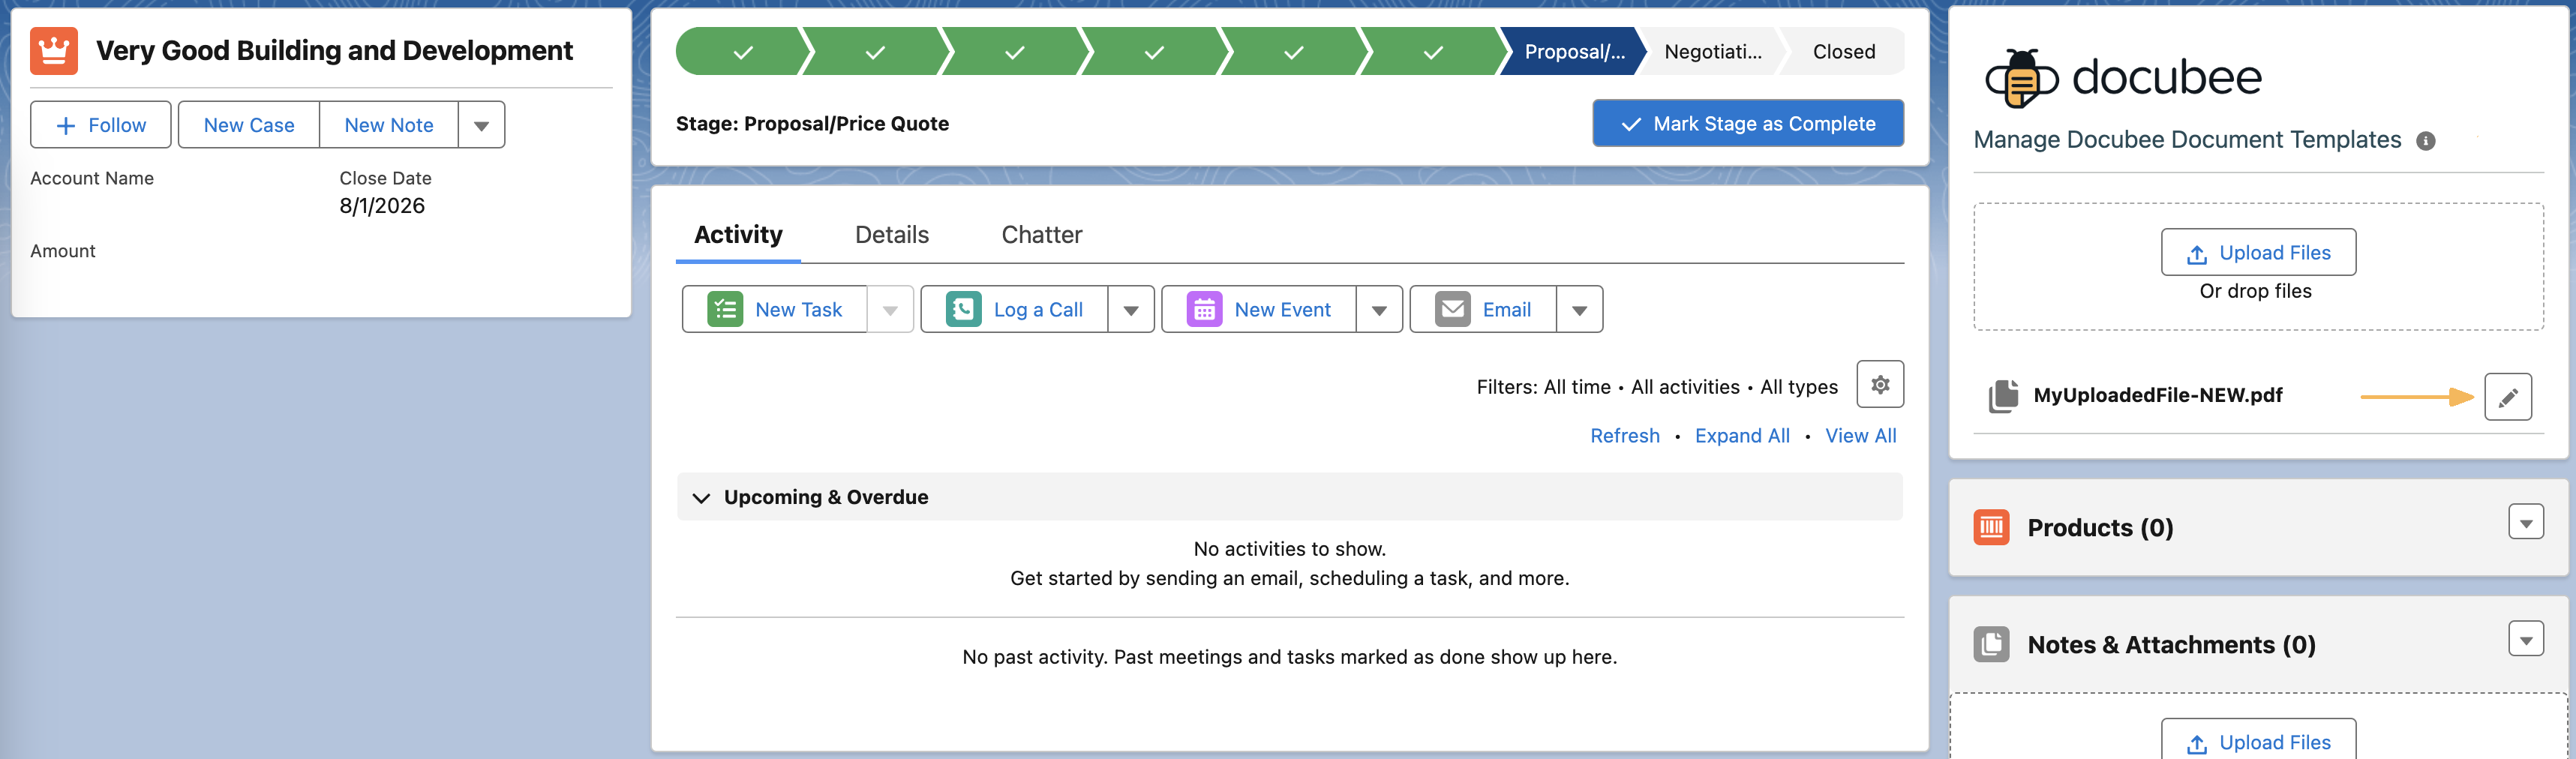
Once uploaded, you can add fillable fields to your document.
- Click the pencil icon (edit) next to your document’s name to open it in the Docubee editor where you can add fields.
Edit Document Fields in Docubee
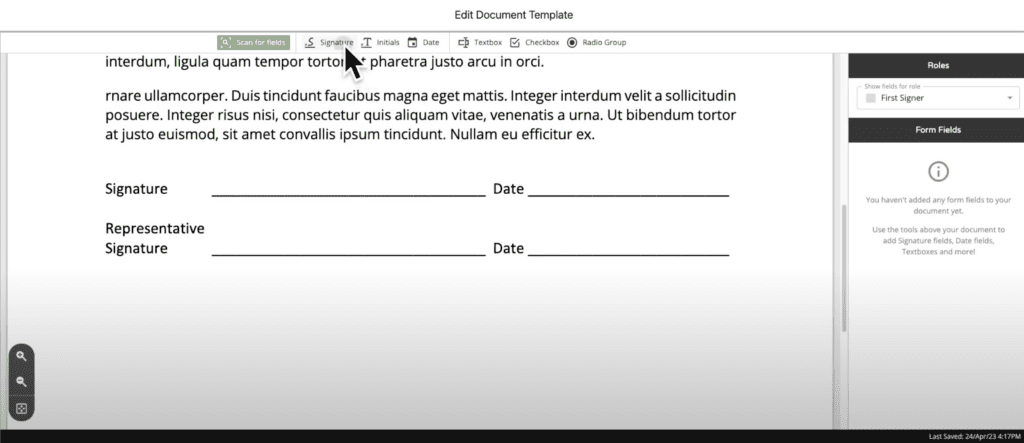
Clicking the edit button (pencil icon) will open your document in the Docubee editor where you can add fields to it.
- Either click the Scan for Fields button for Docubee to scan your document and automatically place fields, or manually drag and drop the fields to suit your specifications.
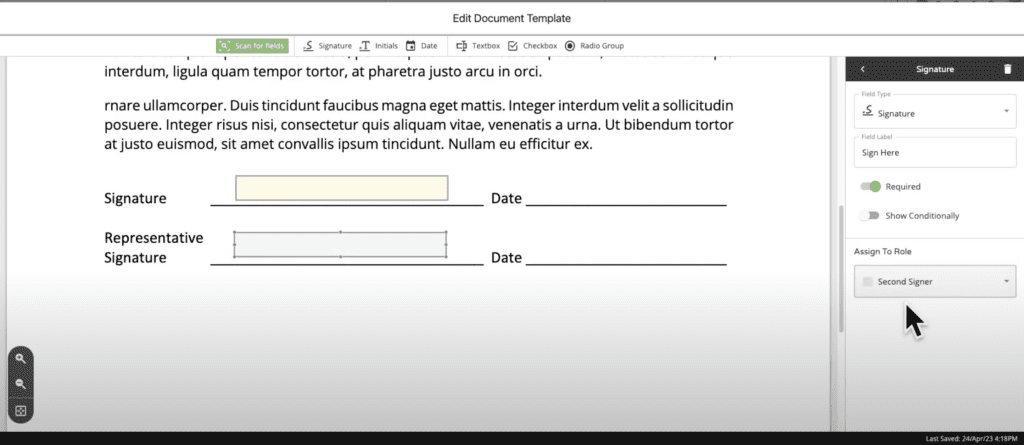
- Depending on how many signers you have, you may need to assign the fields. If you have more than one signer, you can assign each of them fields to complete.
Note: Currently, this integration allows up to 2 signers for any document.
- Add Signature, Initial, Date, Text Box, Checkbox, or Radio Group fields on your document.
- All fields placed on the document will automatically be assigned to the first signer when multiple signers are assigned to the document. Each signer will have exclusive access to these fields.
- To assign a field to another signer, click on the field and then select another signer from the Assign to Role dropdown.
Map Data in Docubee
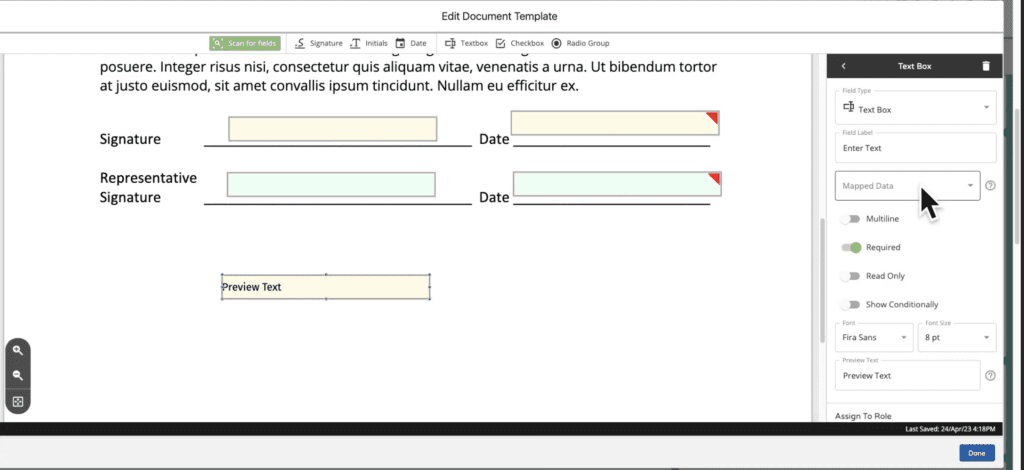
The Docubee Sign for Salesforce integration also gives you the option to map data from the Salesforce opportunity to Docubee’s Date or Text Box fields.
- In the Docubee editor, click the Mapped Data selection dropdown from your Text Box or Date field settings to import this information.
- To prevent signers from changing the imported information, toggle on the Read Only option.
Map Data to Text Box Fields
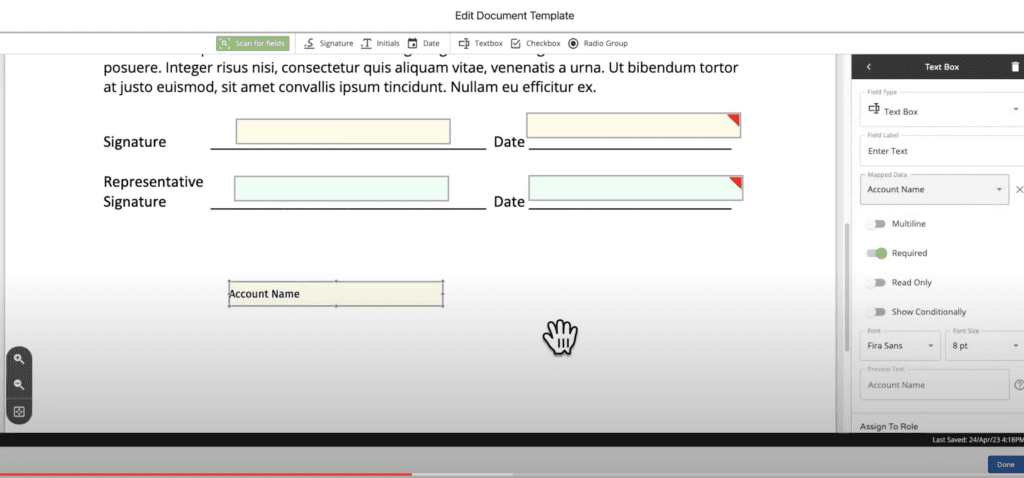
When mapping data for a Text Box field, the information mapped from the Salesforce object will be pre-filled for your signer. For example, if you chose to import the account name, the text associated with that would appear in your text box as shown below.
Salesforce Object Selection for Text Box
Pre-filled Text Box Using Salesforce Object Data
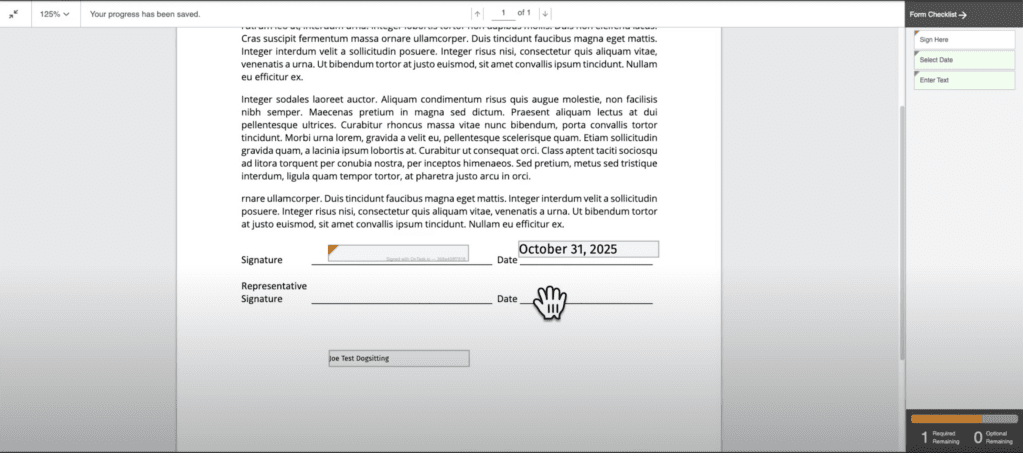
Map Data to Date Fields
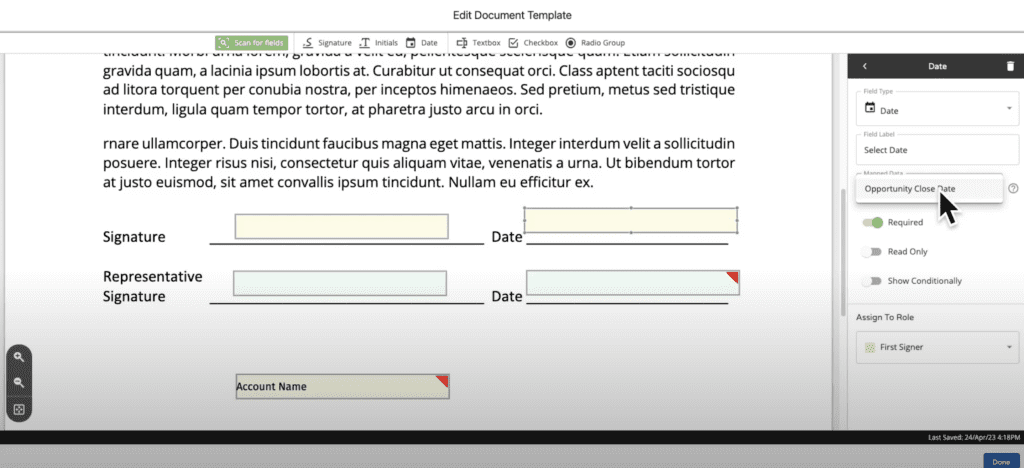
- Use the Opportunity Close Date in Salesforce to pre-fill your date fields.
- Once you’re done adjusting fields and setting up your document, click the Done button.
Send a Document for Signature from Salesforce
Now that your document is complete, it’s time to send it to signers.
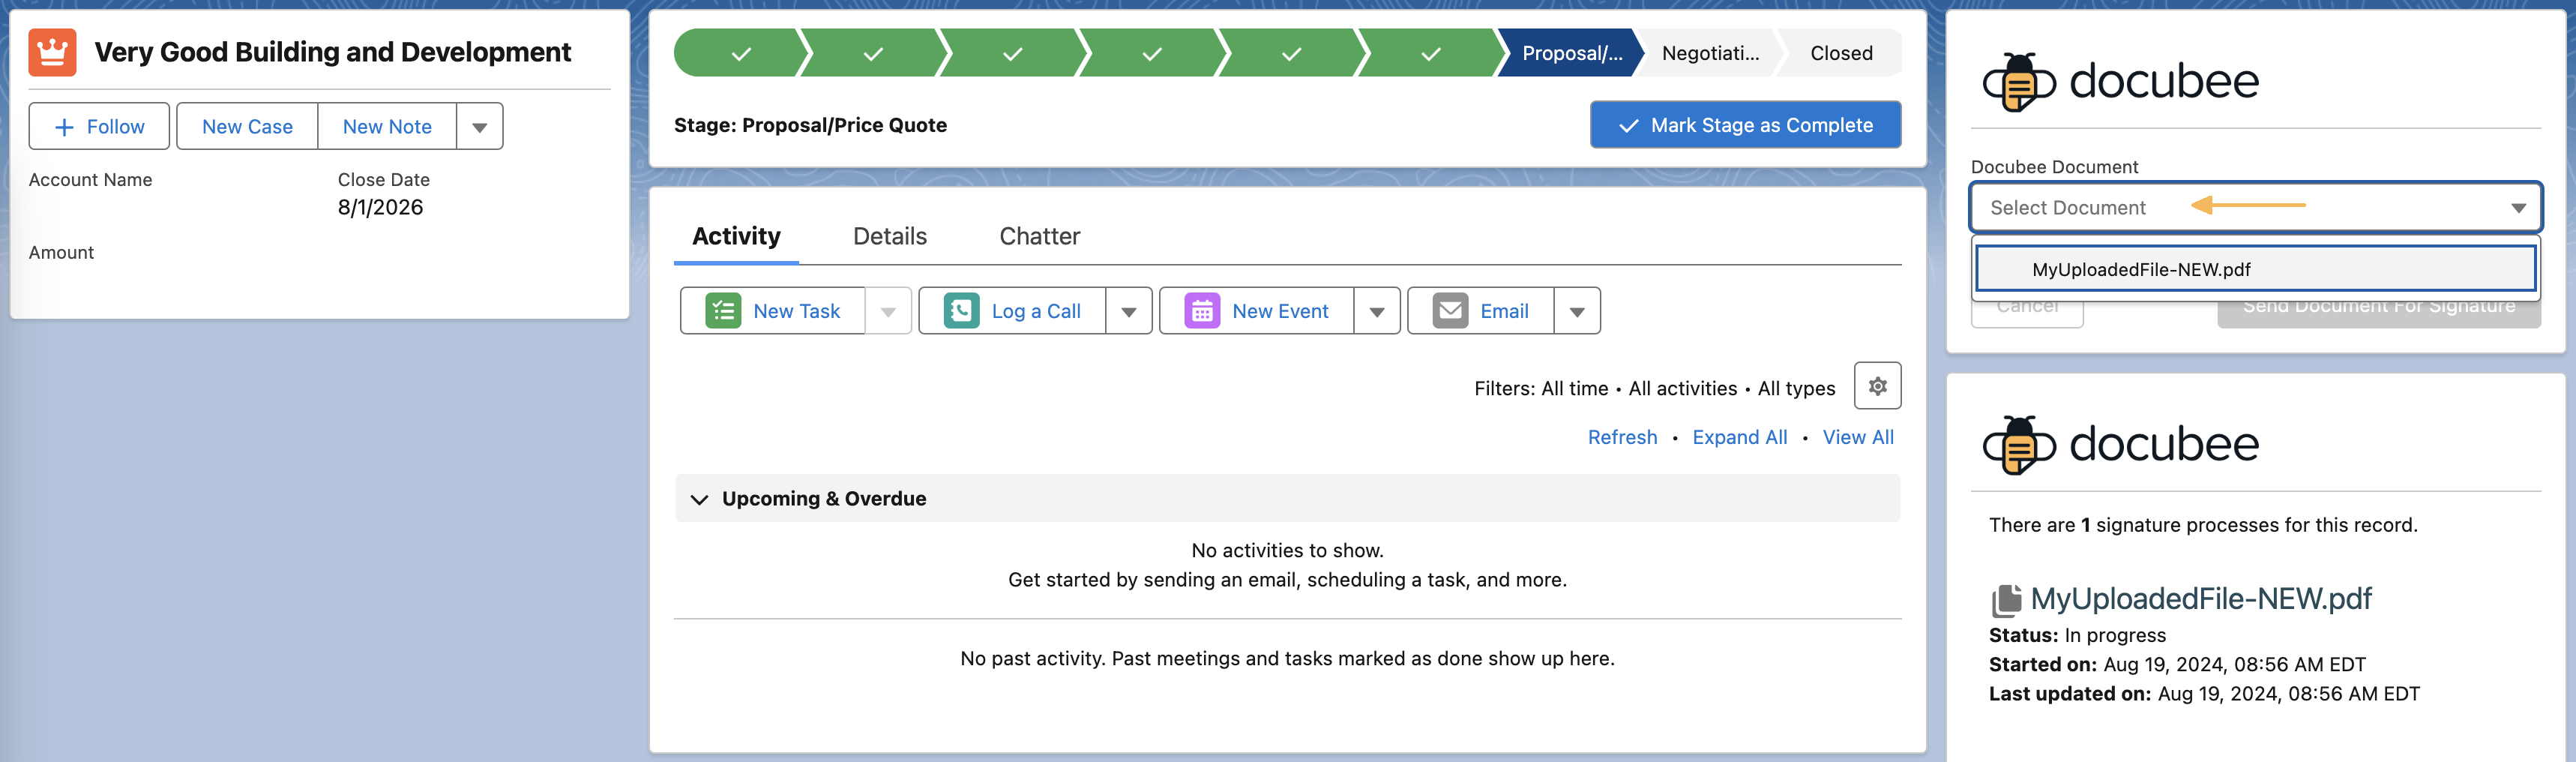
- In Salesforce, navigate to the Docubee Document selection panel and click Select Document.
- Select the document you just created and would like to send.
- Define your signers. You will be prompted to define your first signer in the workflow.
Note: If you have added multiple signers, repeat these steps to define each signer/document recipient.
- Select one of the following:
- Contact from my Opportunity - To select a user related to the Salesforce opportunity.
Note: Docubee eSignature will only show contact roles attached to the opportunity object as options, and not all Salesforce contacts.
- User of my Salesforce Organization - To have one of your internal users sign.
- Select a contact from the Contact to Sign dropdown and click Add Signer. Define the signer.
- After designating all signers, click Send Document for Signature to send the document to all selected signers.
View of What Signers See
Related Information
Salesforce Integration
Salesforce Setup Instructions
Additional Resources
Need more help getting set up? Contact us for assistance from our customer support team or register for Office Hours.

 Map Data to Text Box Fields
When mapping data for a Text Box field, the information mapped from the Salesforce object will be pre-filled for your signer. For example, if you chose to import the account name, the text associated with that would appear in your text box as shown below.
Map Data to Text Box Fields
When mapping data for a Text Box field, the information mapped from the Salesforce object will be pre-filled for your signer. For example, if you chose to import the account name, the text associated with that would appear in your text box as shown below.
 Salesforce Object Selection for Text Box
 Pre-filled Text Box Using Salesforce Object Data
Map Data to Date Fields
Pre-filled Text Box Using Salesforce Object Data
Map Data to Date Fields


 View of What Signers See