Keap is a well-known and loved CRM used by many small businesses. This CRM for SMBs is designed to help small businesses save time and grow with marketing and sales automation tools. Docubee now integrates with Keap with the help of Zapier, to help small business owners automate the creation, sending, and signing of all documents.
This article provides a step-by-step overview of how to integrate Docubee with Keap CRM.
Before You Begin
To set up this integration you’ll need:
- An Docubee account – Sign in to your existing Docubee account or start a 14-day free trial to test out our integration.
- A Keap CRM login
- A free Zapier account
Create the Docubee Workflow
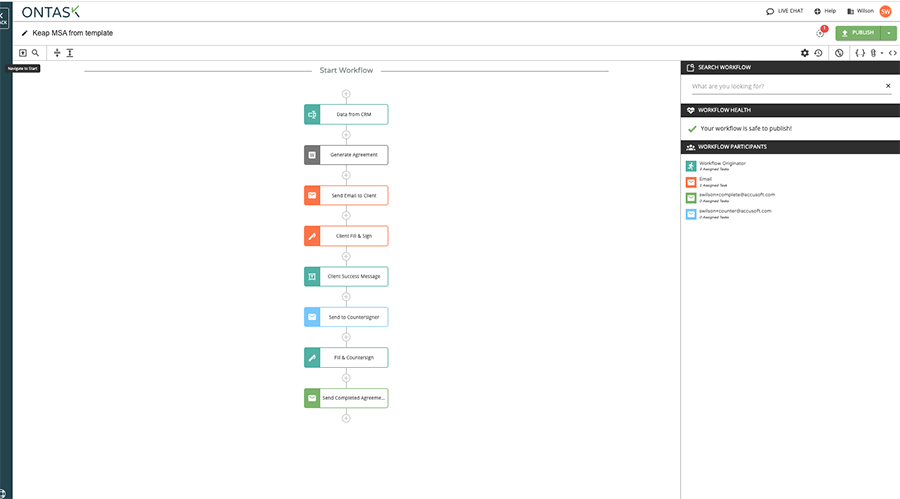
First, you’ll need to create a workflow in Docubee to automate the creation, routing, and collection of signatures for our agreements.
To set up this simple workflow, we will need to do the following:
Create a Web Form Task
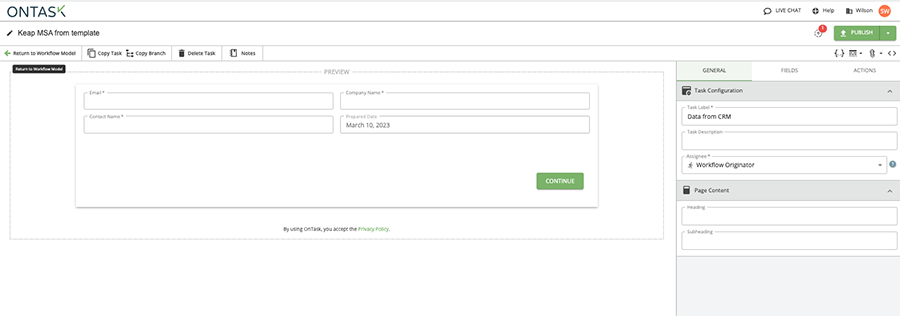
The first task we will add is a web form to collect the data from Keap that will be used to populate our agreement template.
This web form should include fields for the contact name and email, as well as the organization name. See the example below:
Add a Generate Document from Form Data Task
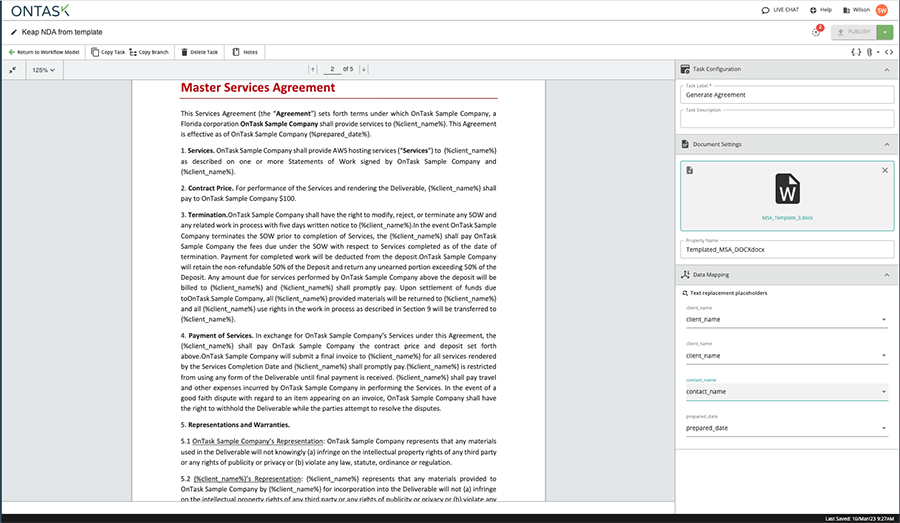
Next, we’ll add a ‘Generate Document from Form Data’ task. This second task uses Docubee to populate a document template with the data collected in the previous form task.
Docubee provides the ability to use your own document template and supply placeholder text like {%Company_Name%} that will be replaced by the contact and organization data for each specific instance of the agreement as shown below:
Add in the Email and Fill and Sign Tasks
Now, we’ll want to add an email task and fill and sign tasks to the workflow. These remaining tasks will be used to send an email to the contact with a link to fill and sign the document.
Once the client signs, the document is then forwarded to a company contact of your choice for countersignature. Upon completion, Docubee displays a success message and emails the completed document to the Keap salesperson and the contact that signed the document.
Add a Custom Tag to Keap
Next, we’ll need to add a custom tag in Keap to connect it with Docubee. This custom tag will be used to trigger the Docubee send and sign MSA workflow we just created.
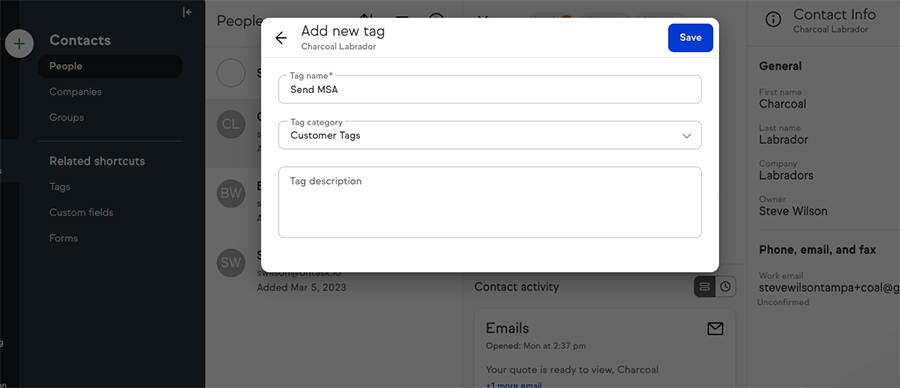
Now we can use that tag to trigger out Docubee workflow via Zapier.
Setting Up Your Keap to Docubee integration in Zapier
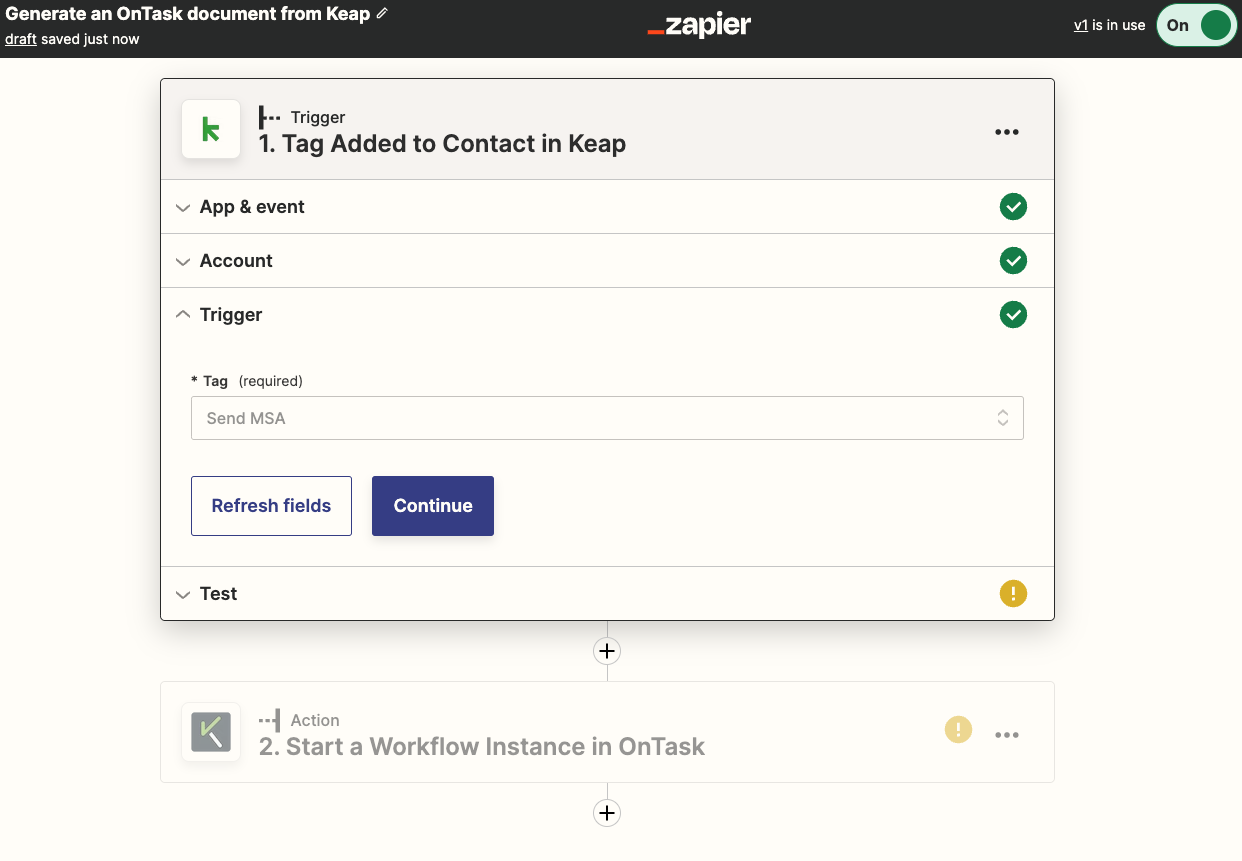
Finally, we’ll need to set up a zap through Zapier that will automate the sharing of your completed document between Docubee and Keap.
Contact us for a zap template to set up your integration.
Once logged in to Keap and Docubee, you will be able to verify that the “Send MSA” tag is set up to trigger your Docubee workflow. It should look like the example shown below:
Triggering the Workflow
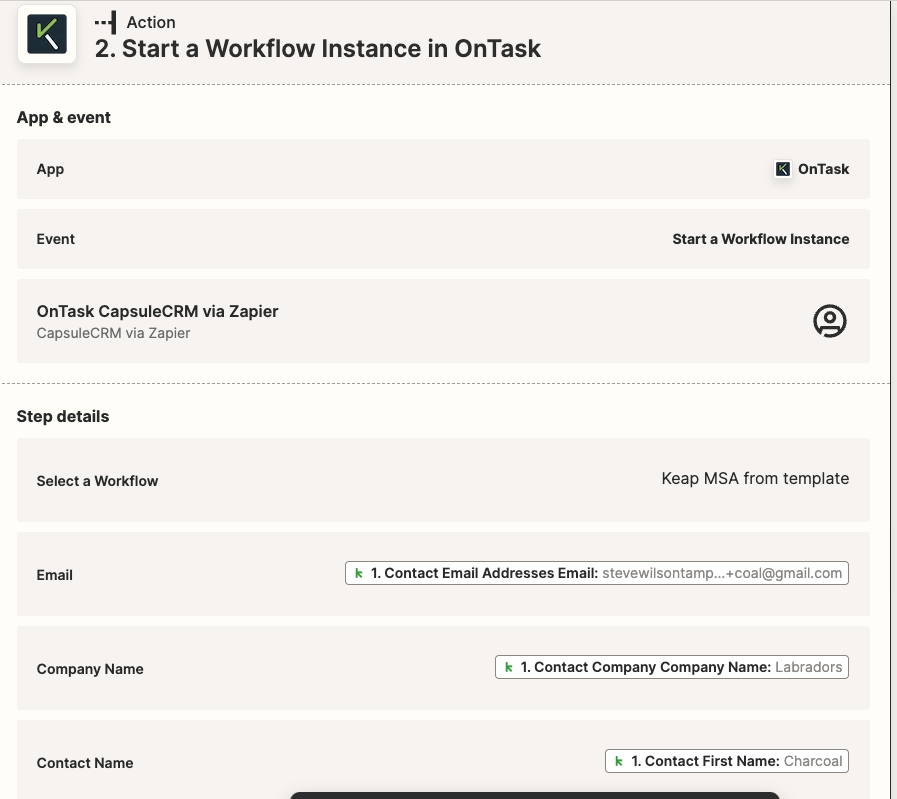
All you need to do once your Zap is set up is hop over to Docubee and run your workflow. Once triggered, Zapier will map the data we need from Keap to power the workflow in Docubee.
Related Information
Zapier Integration with Docubee
Need more help getting set up? Contact us for assistance from our customer support team or register for Office Hours.


