


View our Pricing & Plans for a detailed list and comparison of features available in each plan.
Repository reporting is a feature for generating reports pertaining to your repository’s documents. Use metadata, dates, and tags to filter your repository and create accurate and relevant reports. This helps you stay on top of your repository’s document management tasks, including monitoring critical dates, like renewal dates, expiration dates, cancellation dates, and other relevant dates. It gives you better visibility of the repository allowing you to streamline your management workflow. The reports are available in the Repository‘s Reports tab.
Assign metadata, dates, and tags to the repository’s documents using the Overview tab’s Manage Details button. Edit and manage the document’s metadata, dates, and tags. Configure to receive daily reports via your email.
Before You Begin
You must be on a plan that includes the Repository.
Reports Tab

In the Repository module, click the Reports tab. Here you can create reports and search for reports. It lists all the reports you created in the repository for a workspace.
- Search for a report by name using the Find a report search bar.
- Create a report using the Create Report button at the upper-right corner.
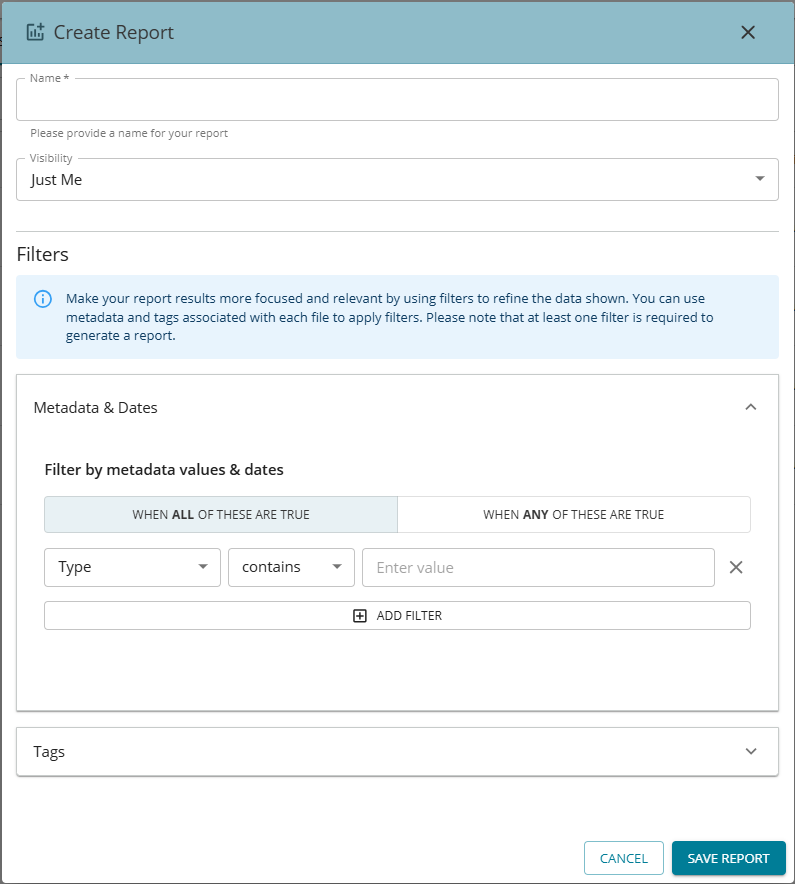
Create Report
- In the Repository‘s Reports tab, click Create Report to open the Create Report modal.

- Enter a name for the report in the Name field.
- Select the report’s visibility from the dropdown:
- Just Me – only you can view the report
- Everyone – all in the workspace can view this report
- Filters – Set filters by using the metadata and tags associated with your contacts. At least one filter is required to create a report.
- Metadata & Dates accordion
- Select whether any or all filters have to be true for a document to be included in the report by selecting one of the following:
- When All of These are True
- When Any of These are True
- Select the metadata to use for the filter from the dropdown:
- Type
- Value
- Payment Terms
- Renewal Terms
- Expiration Date
- Renewal Date
- Cancelation Date
- Created On (date)
- Last Modified (date)
- Select the conditional operator to use for/with the filter from the dropdown:
- Equals
- Contains (not for date-based metadata)
- Greater Than (only with Value, Payment Terms)
- Less Than (only with Value, Payment Terms)
- Next (only with date-based filters)
- Last (only with date-based metadata)
- Between (only with date-based metadata)
- Enter a value that the metadata will be compared to/against for filtering.
- Click Add Filter to add another filter.
Note: Click Remove Filter (X) to remove surplus or unrequired filters. Empty filters will result in an “Invalid metadata filter” message.
- Select whether any or all filters have to be true for a document to be included in the report by selecting one of the following:
- Tags accordion
- Search for a tag or select a tag.
Note: You cannot create tags here. See Add Tags in Overview of Your Docubee Repository for information on adding tags to documents.
- Search for a tag or select a tag.
- Click Save Report to save the filters and generate a report.
- Report information (report name, visibility, created by, and created on) and the documents in the repository that match its filters are displayed.
- Metadata & Dates accordion
View Report
To open and view a report:
- In the Reports tab, hover over the report to view.
- Click View Report to open it.
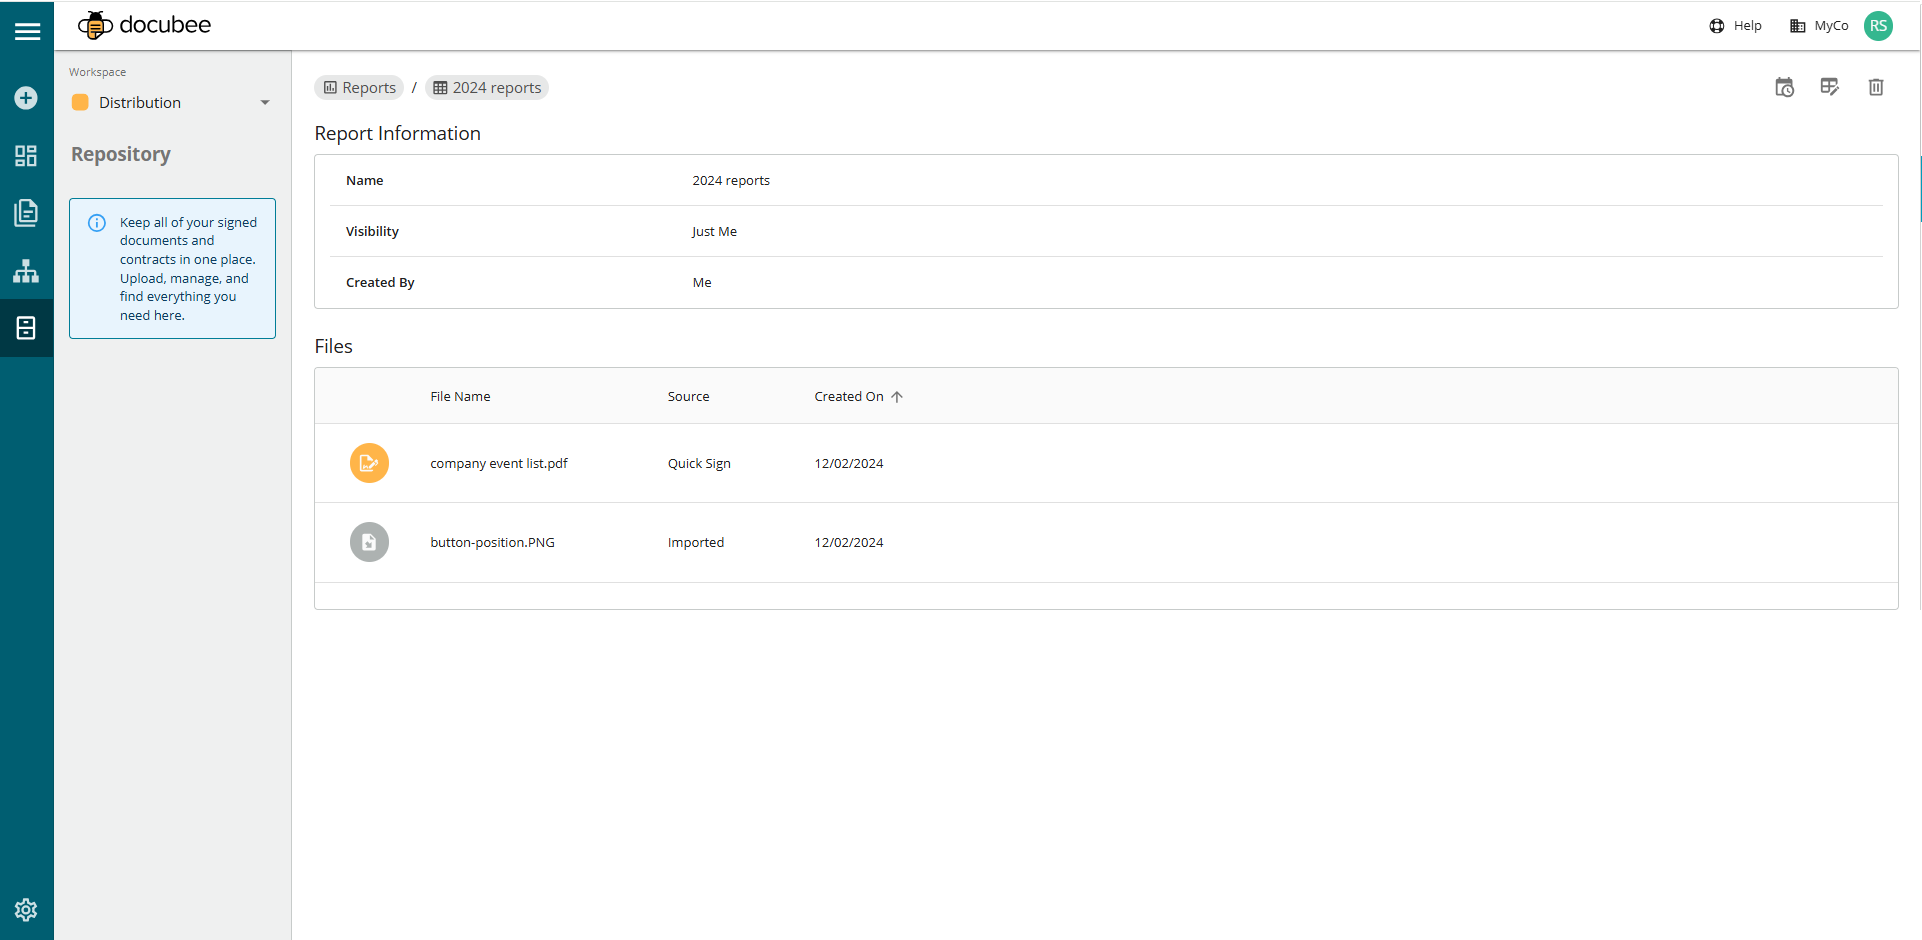
From this page you can:
- view the report information, list of files that comprise the report, and manage their details
- edit the report
- subscribe to the report
- delete the report
Subscribe to Report
Would you like to subscribe to a report for email updates?
To subscribe to a report:
- In the Reports tab, hover over the report.
- Click View Report to open it.
- At the upper-right corner of the report, click Subscribe to Report .
- In the Subscribe to this Report modal, select the days of the week to receive an email about this report, then click Review and Confirm.
- Confirm your selection by clicking Confirm and Save.
Here’s a sample Docubee repository report that arrives via email:
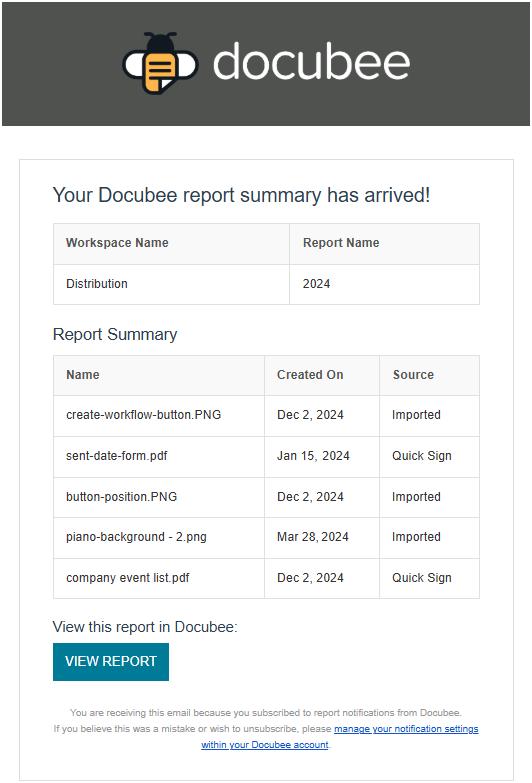
In your email, click View Report to view the report in Docubee.
Edit Report
Viewed your report and feel it needs adjusting?
To edit a report:
- Within the report, click Edit Report at the upper-right corner to open the Create Report modal and modify the report specifications.
Delete Report
Delete a report either from the Reports tab or within the report. When you delete a report, the associated report subscriptions for its subscribed users are also removed.
To delete a report:
- Do one of the following:
- In the Reports tab, click Delete Report on any report to remove it.
- Within the report, click Delete Report at the upper-right corner to delete a report.
Note: The advantage to deleting a report while viewing the report is that you can see the list of the documents it includes before deciding to delete the report.
- In the Reports tab, click Delete Report
- Click Delete when prompted to confirm your intent.
Related Information
Overview of Your Docubee Repository
Additional Resources
Need more help getting set up? Contact us for assistance from our customer support team or register for Office Hours.