

Using Form Link from Docubee
Managing and collecting forms via email is frustrating, inefficient, and can even cause security risks for your business. Not to mention, it can get in the way of creating a positive customer experience.
Now, you can ditch messy distribution of forms. Form Link from Docubee is a feature that allows users to create or upload a form and then share that form via a static link that can be posted or sent through email, embedded on your website, or shown as a QR code on signage.
Users can also set up automated routing for completed documents and incorporate conditional logic for more complicated workflows.
Who Can Use Form Link?
Anyone with an existing Docubee account can use Form Link. The feature is particularly useful for those needing to collect form responses en masse, such as activity registrations, patient sign-ins, waivers, rental agreements, and more. Users do not need a Docubee account to fill out and submit their form.
Great Use Cases of Form Link
Just a few use cases for Form Link include:
- Sign-In/Sign-Up Sheets
- New Patient Intake Forms
- Waivers
- Order Forms
- Acknowledgments
- Permission Slips
Features of Form Link
Similar to PowerForms from DocuSign, Form Link makes it easy to share the forms you create. Some benefits of Form Link include:
- Giving you a centralized way to store forms
- Easy distribution and form fills
- Automated routing
- Legally binding signatures and complaint data collection
- Easy branding and professional display
How to Use Form Link from Docubee
Now that you know how Form Links can help your business, let’s dive into how you can use it.
Before You Begin
You will need a Docubee account to use this feature. If you already have an account, simply sign into your account. You can also create a free trial account here.
1. Upload Your Form
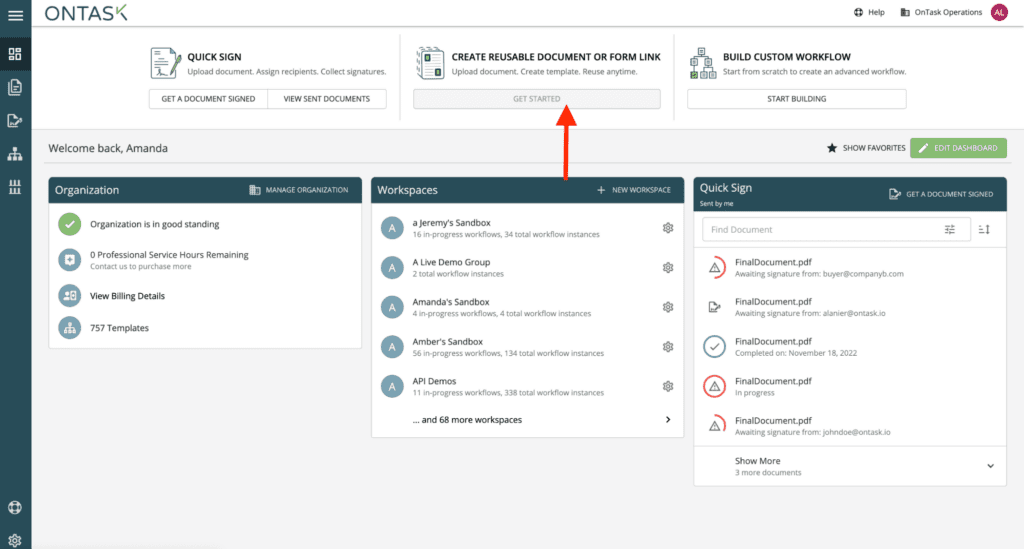
First, you’ll need to upload the form you’d like to use. To do this, click the “Get Started” button under the “Create Reusable Document or Form Link” section from your dashboard.
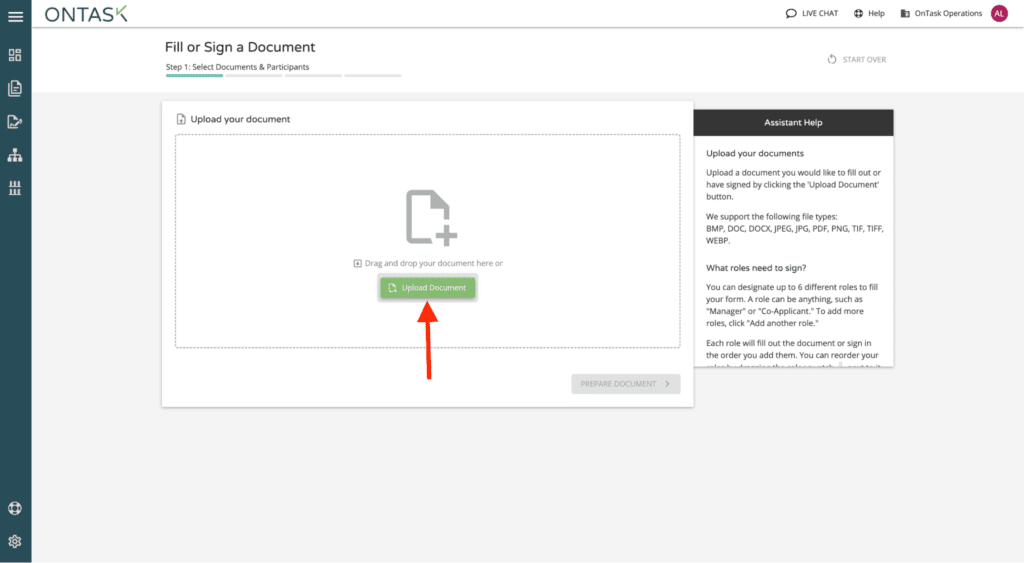
Next, you’ll hit the “Upload Document” button and select the form you’d like to use.
2. Choose “Form Link”
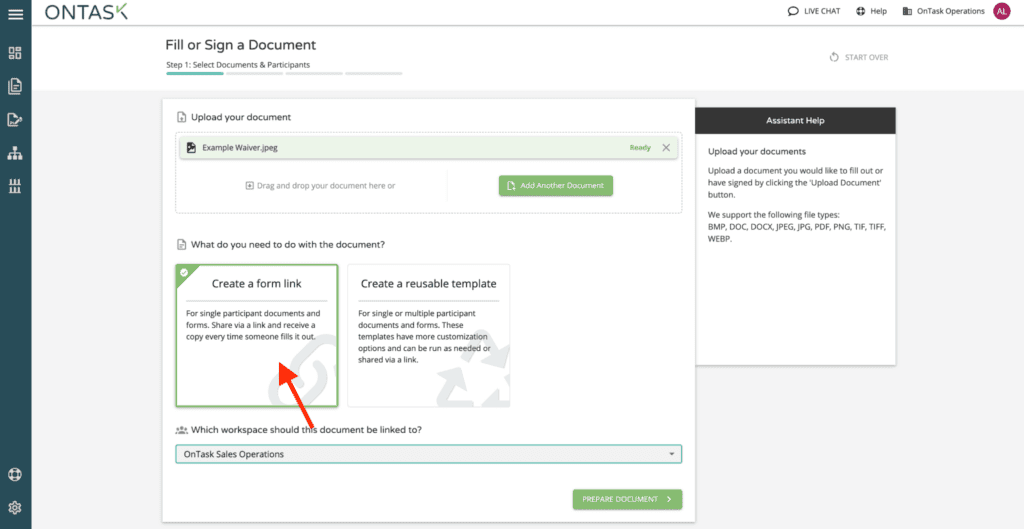
Once your document is uploaded, click the “Create a Form Link” option as shown below. Before proceeding, ensure you have chosen the correct workspace. Then, hit the “Prepare Document” button to continue.
3. Place Fields
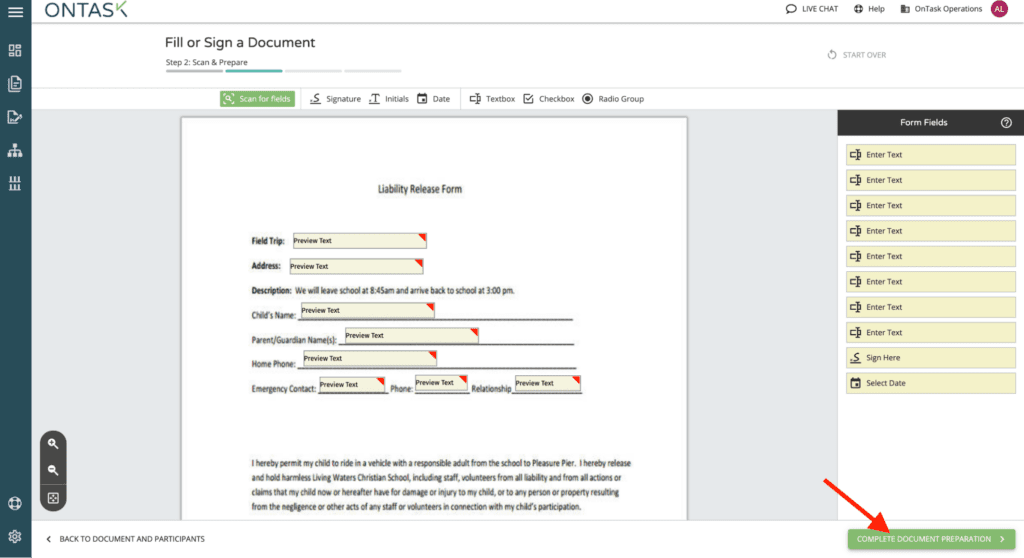
Now that your document has been uploaded, it’s time to place fields. There are two different ways this can be accomplished. The first, is by hitting the “Scan Document for Fields” button on the top left of the editor. By hitting this button, Docubee will scan your document and automatically place fields. You can drag these fields, and adjust their settings by clicking into them.
The second way you can place fields is by manually selecting from the options on the top of the editor and dropping them into place. You have the choice to drag and drop signature, initial date, textbox, checkbox, and radio button fields.
Once you’re done adding and adjusting fields, select the “Complete Document Preparation” button.
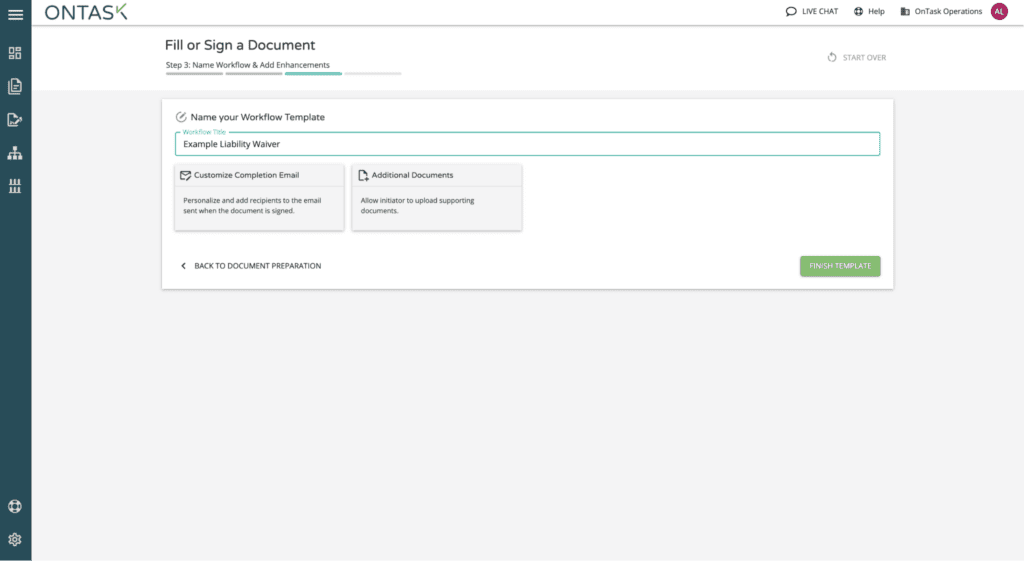
Now it’s time to name your workflow and add any extras you need for your process. As shown below, you can update the workflow title name, customize the completion email users receive upon submission, and add the ability for users to upload supporting documents.
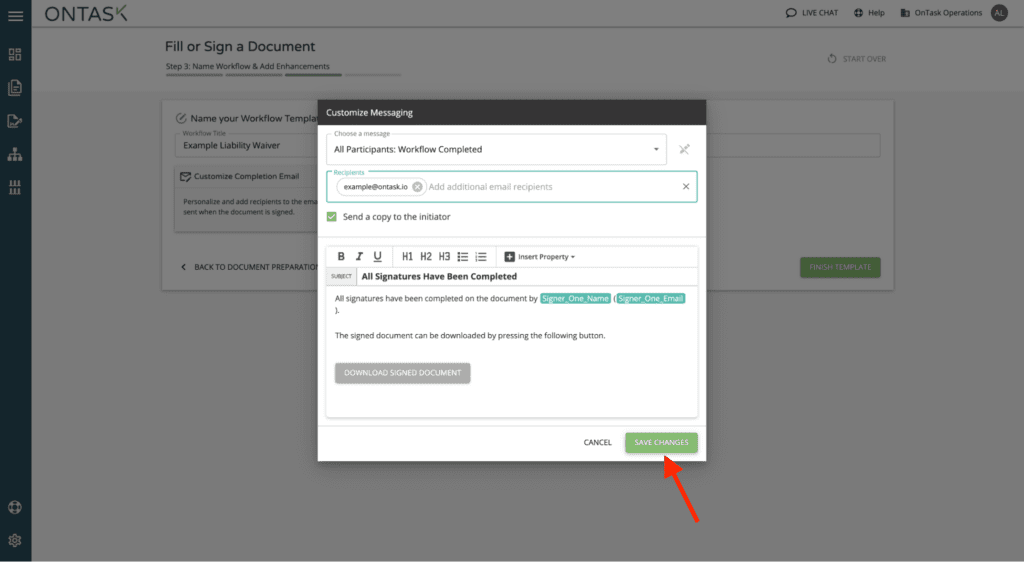
By hitting the “Customize Completion Email” selection, you will open the email editor where you can customize your text, add recipients, and insert properties as shown below. Once you’re done making edits, hit the “Save Changes” button.
4. Share or Embed Your Form
Once your form template is complete, it’s time to share. Click on the URL or the button next to it to get your unique workflow link. This link can be used on your website, in emails, or whatever way you prefer to share it with users.
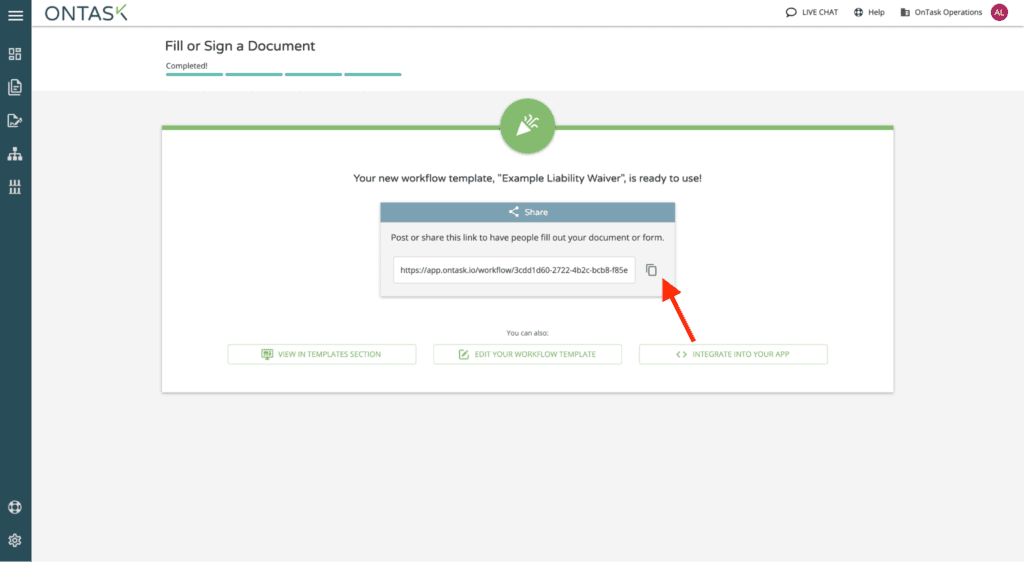
By hitting the “Integrate into Your App” button, you also have the ability to embed the workflow link onto your site or native applications. Clicking this button will open the code you need to copy and paste this form into your platforms.

Need Help Using Form Link?
Need more help getting set up? Contact us here for assistance from our customer support team.

")
