


Preparing a document involves adding fields on the document and defining their attributes. You can prepare a document by either:
- auto scanning fields and manually customizing it, if required.
- manually adding fields to a document.
Note: Our templates will have the fields already prepared. You can customize it as required.
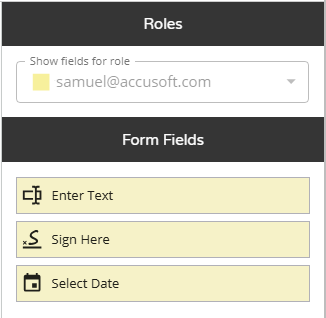
After you have completed setting up Send and Sign in the Fill or Sign modal and click Continue, the Prepare Document modal displays. The right panel displays the Roles and Form Fields on the document assigned to a role.
When using the Edit Template option in the Documents Library, you will encounter the same preparation modal.
Before You Begin
You need to create a Quick Sign process or edit a document template in the Library.
Review Field Types and Field Settings before preparing a document.
Field Types
Field types determine the type of data a signer can enter into the field. You can pre-fill fields and choose whether to make them editable. The fields are accessible on the toolbar in the document.
![]()
To add a field in the document, click the field in the toolbar then click in the document to place and position it. Configure fields using the settings in the right panel.
Available field types are:
- Signature – Signers can add their signature.
- Initials – Signers can add their initials.
- Date – Signers can choose a date from the standard calendar date picker widget. You can pre-fill the date field and choose to allow/restrict the signer editing it.
- Textbox – Signers can enter text.
- Checkbox – Signers can select one or more checkboxes.
- Radio Group – Signers can select from the multiple choices using the radio buttons offered.
- Request File – Signers can attach (files) during the document signing process.
Field Settings
Field settings vary by field type. After configuring a field, click < at the upper-left of the panel to return to Roles and Form Fields.
Most field types have the following properties:
- Field Type – you can always change the field type by using the dropdown and selecting another type.
- Field Label – The descriptive label associated with the form field and giving it context.
- Required – Switch on/off the toggle to set whether this field is a mandatory field or not.
Note: The end-user will not be able to submit until all required fields are satisfied. - Show Conditionally – (Excludes radio groups.) Lets you set the condition to meet for this field to be displayed as either enabled, disabled, or invisible. Switch it on to display the Add Conditions button. Click Add Conditions to slide out the Edit Conditions modal. See Edit Conditions Modal for more information.
Note: if you have added any conditions, the Add Conditions button will be renamed to Manage Conditions. - Assign to Role – You can assign each field to a role.
Additional Setting for Signature
An additional property for signature is:
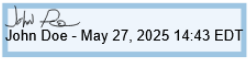
- Signature Type – Use the Signature Type dropdown to choose between the following:
- Esignature – Signers can add their signature.
- Esignature, name and date – After signers can add their signature, their printed name and date is stamped below it.
Note: This meets CPAS compliance standards.
Here’s an example:

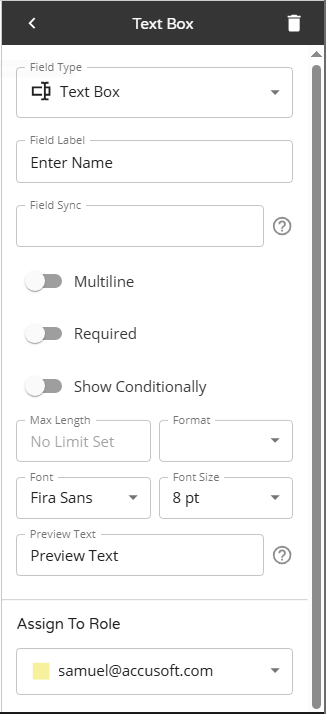
Additional Settings for Textbox
Some additional properties for textbox are:
- Field Sync – See Field Sync for information.
- Multiline – Select to allow a signer to enter text of multiple lines.
- Max Length – The maximum number of characters a signer can enter into a text field. It controls the size of the field on the form and prevents entries that exceed the specified limit.
- Format – The format controls how signers enter data into a Textbox field by applying a predefined mask or format. Choose from Date, Phone Number, or Zip Code format options to ensure data is entered in the correct format. This helps to guide users with clear formatting expectations (e.g., phone number) and restrict invalid input.
- Font – Select the font to use for the data that will be entered. It is also used as the preview font.
- Font Size – Select the font size.
- Preview Text – Enter sample preview text to visualize how the signer’s input text will look on your document.
Note: It does not prefill the field in your document. While designing the form, it lets you preview how a participant’s input in the field would appear.
Additional Settings for Date
Some additional properties for date are:
- Field Sync – See Field Sync for information.
- Read Only – Select to prevent date modifications.
- Prefill Date – See Prefill Date Fields for more information.
Prefill Date Fields
When configuring Date fields, you can prefill it in one of the following ways by turning on the option:
- Prefill with date acted upon – Date the signer opens the document.
- Prefill with date sent – Populates the date the document was sent for signing.
- Prefill with date acted upon plus a specified offset – Specify the offset by entering the number of Years, Months, and/or Days.
- Prefill with a specific date – Select the specific date from the date picker.
Radio Button Properties
A radio button group consists of two or more radio buttons. You can add additional radio buttons to your group by clicking the add radio button to group button.
Modify the properties in the right side panel.
- Radio Group Details
- Field Name – The name for the radio button group.
- Assign Role – Select an assignee from the dropdown.
- Required – Select whether the radio button group is required or not.
- Radio Buttons
- Add Radio Button to Group – Adds an additional radio button to the document. Click this button and then click in the document to place it in the document and add it to the group.
- Radio button list – Lists all the radio buttons in the group. A new radio button will display in the radio button list as Option 1.
- Option 1 – Rename the radio button using the Value field.
Note: For every button you add, a new row appears where you can enter its value.
Request File Attachment in a Document
You can request attachments (files) from signers during the document signing process, such as identification or proof of vaccination.
- Click the Request File button on the toolbar and position it on the document.
- In the right panel, modify the Field Label to make it helpful to the signer, set whether it should be a required attachment or not, and assign it to a role.
- When the QS is sent, an email will notify signers they have a document to review and sign.
Signer Attaches Document
When signers receive the email, they should:
- Click the Review Document button in the email to open the document.
- Click the Attach File field to open the Attach File modal and select the relevant file.
- Click Save Attachment to upload the file.
The field is removed from the document and the right panel displays the Roles and Forms Fields.
Manage Fields on Your Document
All the fields on your document are also listed in the right panel under Form Fields.
- Reorder fields – Click and grab a field on your document, then drag to adjust its position.
- Edit field – Click the field on your document to adjust its settings in the right panel.
Note: You can also click the field under Form Fields to modify its settings. - Resize field – Click the field on the document and drag the blue dots on its border to resize it.
Note: When working with very small fields, use the zoom tool at the lower-left of the viewer to zoom in for better precision. - Reposition/Move field – Click the field on the document and then drag and drop it to its new position.
- Delete field – To delete a form field:
- Select the field to delete on the document or under Form Fields.
- Either click Remove Field (trash can icon) at the upper-right corner of the right side panel or press backspace on your keyboard.
Add Fields
Scan for Fields
If your document has field labels on it, you can save time and effort of preparing the document (adding form fields) by using our intelligent fields extractor to do the work for you. It scans the document, identifies the fields on it, and places appropriate form fields close to the field labels. For large documents it may take a few moments to locate the fields.
- Click Scan for Fields to scan the document and automatically extract the fields. The located fields are placed beside the appropriate label. You can customize the fields.
- At the top right click Send For Signature.
Customize Fields
After scanning for fields, you can customize it by doing the following:
- Rearrange placed fields by dragging and dropping on a different spot on the document.
- Manually add more fields or delete the unwanted ones.
- By default, all tasks will be assigned to the first signer listed.
- Reassign a field by clicking it and selecting a different role from the right panel.
- Change the type (Field Type) of the field.
- Change the field’s appearance.
- Switch on/off the toggle for whether each field should be required or not.
Manually Add Fields
If you prefer to manually add fields to the document for more control over the fields or other reasons, follow these guidelines:
- Click on a field type in the toolbar and then click in the document to place the field on the form. See Field Types for information.
Note: See Manage Fields on Your Document for information on resizing and repositioning fields. - In the right panel, set its properties/characteristics. These vary per field type. See Field Settings for information.
- After adding all the fields, at the upper-right corner, click Send For Signature.
See Send and Sign in Quick Sign for more information.
Related Information
Quick Sign
All About Quick Sign (Quick Reference)
Additional Resources
Need more help getting set up? Contact us for assistance from our customer support team or register for Office Hours.