


View our Pricing & Plans for a detailed list and comparison of features available in each plan.
Create a reusable document template from the document you sign frequently to save time. A reusable template is ideal for frequently used documents and forms that will be sent or shared multiple times with single or multiple participants. It allows for customization options like expiration dates.
If you choose the Create a Reusable Document Template option, you should assign roles to the fields when editing the template. Once the template is configured, email it to participants or generate a signing link for sharing.
Add a Document and Create a Template
Templates in your Library are available for use in your workflows and Quick Signs.
To create a reusable template:
- From the Docubee dashboard, under Create Reusable Document Template, click Get Started.

- The Documents Library will open and display the Add a Document and Create a Template modal.
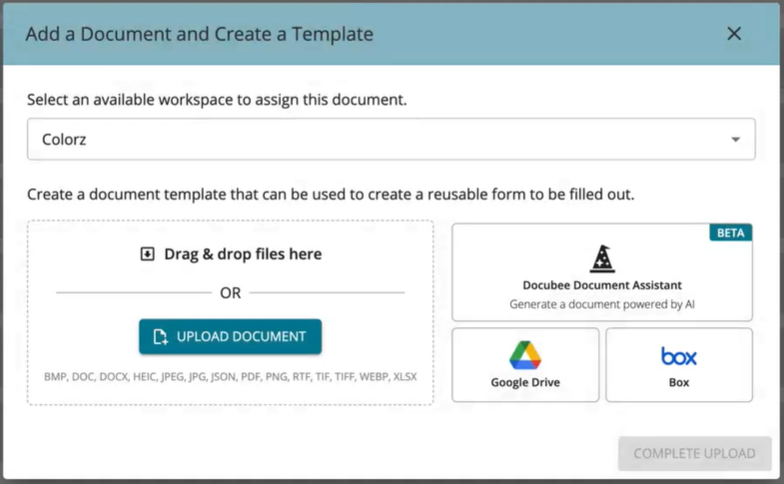
- From the dropdown, select the workspace where you want to assign the template.
- Click Upload Document to browse the files on your local machine and select the document you want to upload for signing. You are informed that your document is ready to upload.
Note: Alternatively, you can drag and drop a document, upload one from Google Drive or Box, or use the Docubee Document Assistant to generate a document. See Upload a Document (Quick Sign) for more information.
Note: You can upload 20 documents at a time to the Library and can combine up to 20 documents in Quick Signs. See Quick Sign for a list of supported file formats. - (Optional) You can rename the document in the Rename Document field that appears after your document is ready to upload. You can also rename it later in the Library by clicking its name.
- Click Complete Upload to add your document to your Library. A message at the lower-right indicates that the document was added successfully.
- On the new template in your Library, click the More Actions menu (three vertical dots icon), then select Edit Template to convert this document into a template. The document will open in edit mode.
- In the right panel, under Roles, click Manage Roles to open the Manage Roles modal and add or edit roles for each person who will sign the document. See Edit Template in Documents Library for more information.
- In the document, place fields from the top toolbar onto the document, define their properties, and assign roles to them. Alternatively, use the Scan for Fields option on the toolbar.
- Optional customizations that can also be done for documents previously uploaded to the Library:
- To add a default name and email address per role, click Manage Roles in the Roles tab.
- To request additional documents, place the Request File field from the top toolbar onto the document.
- To allow participants to delegate signing, turn on the Allow signer to delegate option when configuring the signer in Quick Signs.
Note: This option cannot be set when defining a role.
- At the upper-right corner, click either:
- Return to Document Library to return to the Library.
- Send for Quick Sign to send the template to assigned recipients for signature.
Note: See Quick Signs for more information on Advanced Settings | Additional Actions such as customizing the notification email, allowing a signer to delegate, etc., configuring the expiration date for the Quick Signs process before sending it for signature, renaming the Quick SIgn process, and more.
Generate a Signing Link
To use Generate Signing Link, the document must have only one role configured with fields placed and you can adjust this by using Edit Template. See Generate Signing Link under Document Actions in Documents Library.
Simplify how you collect signed forms by generating a static signing link! This feature helps you avoid the inefficiencies and risks of managing forms attached in emails. You can share documents via a static link that can be sent through email, embedded on your website, or displayed as a QR code on signage.
This is particularly useful for collecting form responses en masse, such as for activity registrations, patient sign-ins, waivers, and rental agreements. It is also ideal for forms like signup sheets or waivers, designed for a single participant. Participants do not need a Docubee account to fill out and submit their form.
Each time a participant fills out the form via the link, the Quick Signs process details will be available in the Completed sections of Quick Signs.
Known Limitations
- Only file formats listed on the Add a Document and Create a Template modal are supported. This list is also available in the Quick Sign article.
- Password protected files cannot be uploaded.
- A maximum of 20 documents can be uploaded at a time.
Related Information
Quick Sign
Upload a Document (Quick Sign)
Prepare Document Modal (Quick Sign)
Overview of the Documents Section
Configure and Manage Roles
Additional Resources
Need more help getting set up? Contact us for assistance from our customer support team or register for Office Hours.