Products

View Products Overview

Collect information to use in contracts and agreements.

Create contracts swiftly through templates, AI, or create and edit your own.

Route contracts seamlessly for editing, review, and approval.

Easily work with internal and external participants to edit and redline contracts in real-time

Capture secure, compliant, and legally binding signatures on any device.

Connect to the systems you use daily, or build into your application with our APIs.

Overview of the Documents Section

View our Pricing & Plans for a detailed list and comparison of features available in each plan.

The Documents section is where you manage your documents. The documents you upload in the Documents section are securely stored here and available for use across Docubee, whether it is Quick Signs, contracts, workflows, or API calls.

In this article:

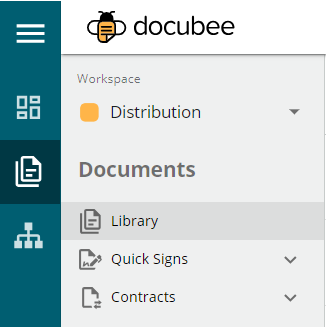
The Documents Section

On the dashboard’s left navigation bar click the Documents icon documents_icon to display the Documents section for a workspace. It gives you access to the Library, Quick Signs, and Contracts of that workspace.

documents-section-left-top

Click the New button new-button at the upper-right corner to access the context menu. From there, you can:

You can use the search bar at the top of Library, Quick Signs, and Contracts to find documents, quick signs, or contracts. The search function in Quick Signs allows filtering.

Library Tab

The Documents section’s default tab is the Library and it lists the uploaded documents. See Add a Document to the Library for information on uploading documents.

documents-section

Hover over an uploaded document to access various actions on the right side – Quick Sign Document, Preview File, Download File, and More Actions menu (three dots icon). The frequently used document actions are provided as icons for quick access.

document-hover-right

These frequently used actions along with the rest of the actions are in the More Actions shortcut menu.

More Actions Menu

The More Actions menu has several document actions and a Quick Sign action. The Quick Sign action is to view all Quick Signs originating from the selected document.

Before you choose the Quick Sign Document option, you may want to further prepare your document using the other options in the More Actions menu. For example, you can edit the document (use the Edit option), add/modify roles and fields (use the Manage Roles and Fields option), stamp the document and enter data (use the Stamp option), or use other options available in the menu.

more-menu     more-menu-2

Document Actions:

  • Quick Sign Document – Opens the Fill or Sign modal where you can choose to sign the document yourself or send it to participants for signing. See Quick Sign for more information.
    • If no fields were placed on the document before sending for signing, a custom signature page will be added to the end of the document with signature and date fields for the specified number of signers.
    • If you decide to add/modify roles and form fields on the document now, use the Manage Roles and Fields option before sending your document for signing.
  • Bulk Start Quick Signs – Opens the Bulk Start Quick Signs modal where you upload a CSV file. You can bulk start up to 250 quick sign instances so your CSV file can have a maximum of 250 rows. Click Bulk Start Quick Signs to initiate the process.
    Note: Click Click here to download a sample to download a sample CSV file. The first row of the CSV file represents the name of all roles on the document. Each row after this header row represents a QS instance containing the email address of each of the recipients for each role.
    You can turn on the following using the toggles:

    • Set Signing Order – When turned on, emails are sent to each signer sequentially. When turned off, emails are sent to all signers simultaneously.
    • Cancel bulk started process on failure – When turned on, it lists failed processes and provides a Download Report button to download the report of failed processes. You can then restart the failed processes.
  • Edit – This action requires Admin privileges and is only available if your document is a DOCX file (a Microsoft Word document). It opens the document in collaboration mode where you can make edits or suggestions. Anyone in your workspace with admin permissions can collaborate on DOCX files in real time in your library. You get the most recent document available anytime you access it while keeping management in one platform.
    Note: If your document is in the older .doc file format, first convert it to .docx before uploading it.
  • Manage Roles and Fields – This action requires Admin privileges. Opens the document and allows you to add/modify the roles and form fields. The right section displays the roles and their assigned form fields that they will have to fill.
    • In the right bar under Roles, click the Manage Roles button to open the Manage Roles modal, where you can add more roles or edit existing ones.
    • Add fillable fields to the document using the fields list on the top row below the document header. The fillable fields available are: Signature, Initials, Date, Textbox, Checkbox, Radio Group, and Request File.
    • In the right section under Form Fields, you can edit the form fields’ settings to suit your input requirements.
    • Only signees associated with a particular role will be able to fill these fields. This feature was created with reusability in mind. Email addresses for these roles can only be provided when sending them for signatures, making the document useful for multiple occasions.
      Note: Each role has a color code, and the fields assigned to each role have the same color. This helps distinguish which field is tied to which role.
  • Stamp Document – This action requires Admin privileges. Opens the document and allows you to apply stamps on it. You can enter content in the stamps that you placed on the document using the following as guidelines:
    1. Enter your data in the stamps and save it by clicking Make Changes Permanent at the upper-right corner.
    2. You are prompted with a message that the changes will be permanent and cannot be edited. Click Stamp Document to confirm or click Cancel to reject.
  • Generate Signing Link – Opens the Generate Signing Link modal that has a URL and a QR code for the quick sign document that you can copy and share with your signee(s). 
  • Preview – Provides a preview of the entire document in a popup viewer.
  • Download – Downloads the document to your computer.
  • Download as PDF – This action is available if your document is a DOCX file (a Microsoft Word document). Downloads a PDF of the document to your computer.
  • Delete – This action requires Admin privileges. The delete action cannot be undone. Prompts you for confirmation to delete the document. Click Delete Document to confirm and proceed with the deletion.

Quick Signs:

  • View Sent Quick Signs – Navigates to the Documents | Quick Signs tab and displays all signing instances started with this document. See Quick Signs tab for more information.

Add a Document to the Library

  1. At the upper-right corner, click the New button and select Add Document to Library to open the Add a Document modal.
    new-doc-to-lib

  2. We make it extremely convenient for you to upload documents from various sources.
    add-document-modal
    In the Add a Document modal, click one of these buttons:

    • Upload Document or drag & drop files here
    • Docubee Document Assistant
    • Google Drive
    • Box
  3. Select the document(s) to upload.
  4. The selected document(s) will be listed on the modal as ‘Ready to upload’.
    ready-to-upload
  5. Click Complete Upload to upload the selected documents to the Library.

You can see the uploaded documents listed in the Library. You can access these documents from your library for your Quick Signs, contracts, etc.

Quick Signs Tab

The Quick Signs tab lists all sent quick signs. See Quick Sign for more information.

Search and Filter Sent Quick Signs

You can search by entering a query in the search bar or filter the list of sent quick sign documents by clicking in the search bar and selecting Filter by …:

  • Status (in-progress, complete, canceled and/or expired), 
  • Recipients (pick from the list of recipients in the dropdown that displays), 
  • Document Templates (pick from the list in the dropdown that displays), and 
  • Process Names (pick from the list in the dropdown that displays)

documents-qs-search-filter-by

Example filter by status of ‘in-progress’ and document template for ‘sample-doc’:

documents-qs-example-searchbar

Quick Sign Instance Information

Click on a quick sign instance to view its details in the right section. Details include the quick sign process name, expiration date (if set), the signature collection progress, who has viewed/not viewed it, who has signed/not signed it, and allows previewing and/or downloading the document in the current state.

qs-instance-info

For information on using the Admin Actions (gear icon), please see Quick Sign | Manage Recipients.

Contracts Tab

The contracts tab lists all your contracts. See Contract Automation for more information.

Related Information

Quick Sign
Contract Automation
Overview of your Docubee Dashboard
Additional Resources

Need more help getting set up? Contact us for assistance from our customer support team.