


View our Pricing & Plans for a detailed list and comparison of features available in each plan.
A Fill and Sign task allows you to either upload a document (PDF, Office, or image file) or refer to a document (PDF, Office, or image file) from a previous step in your workflow that you can assign to a participant to fill out and/or sign.
Before You Begin
You need to create a workflow.
Create a Fill & Sign Task
-
- In the workflow builder, click Insert First Task or the + above or below an existing step.
- In the right-side panel’s Add Task, choose the User Task tab, then Fill and Sign.
- Click the new Fill and Sign task.
- In the General Configuration tab, set the following:
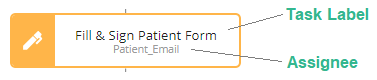
- Task Label – Rename the default task label from “Fill & Sign” to make it meaningful and descriptive to help identify the task.
Note: These are listed as event names on the instance list History tab.

- Assignee – From the assignee dropdown, select the individual responsible for completing the task. The workflow originator (the person who ran the workflow) will be available for selection along with the other participants invited to the workflow. Or, reference the assignee as a property.
Note: The assignee must be associated with an email address collected in a previous workflow task. - Add Instructions for the User – Provide participant guidelines or other relevant information for this task. These custom instructions will be displayed to the participant in the left-side panel when they arrive at this task.
- Click the Add Instructions for the User button to open the custom instructions editor. Enter your custom message and click Close Editor when done.
- Task Label – Rename the default task label from “Fill & Sign” to make it meaningful and descriptive to help identify the task.
- In the Document Settings tab, provide a PDF, Office, or image document file that the assignee will fill out and/or sign. Specify the document in one of the following ways:
- Click Upload Document or drag & drop a document – Upload the file (click the Upload Document button to select a file or drop a file onto the box).
Note: When you upload a document using any of the available means or drag & drop a document, two more tabs will be made available for managing your form: Place Fields tab and Dynamic Fields tab.
Note: If you modify the Property Name of your File Upload field in the Web Form task prior to this Fill and Sign task, the Property Name in the Document Settings of this task will no longer be valid. You will have to reselect the correct document in the Fill and Sign task to ensure that the correct file is being used. - Select a workflow document name from the dropdown – The Select a Workflow Document dropdown lists the names of documents that have been uploaded or combined/generated in a previous workflow step (such as a web form task with a file upload field or an edit document task). This will also be used as this document’s property name so that you can reference it in later workflow steps.
Note: When you select a workflow document, an additional tab will be made available for managing your form: Dynamic Fields tab.- Upload a sample document to place fields – When using a document that is either uploaded or generated in a previous task, you can upload a sample document as a base for placing your fields. This enables you to provide a document that is similar to those you expect to process in your workflow so that you can place fields accurately.
The sample document file will be dynamically replaced in the running workflow (click the Drop file here or click to upload box to select a file or drop a file into it).
Note: Select a document that will closely match the document that will be uploaded dynamically. This is important as the fields you place on the sample document will need to be located correctly on the final document.
Note: If the property you chose from the document name picker in the last step doesn’t correlate to a document in the running workflow, this sample document will be used instead.
- Upload a sample document to place fields – When using a document that is either uploaded or generated in a previous task, you can upload a sample document as a base for placing your fields. This enables you to provide a document that is similar to those you expect to process in your workflow so that you can place fields accurately.
- After you have selected a document, click the Document Settings tab to access and turn on following options:
- Digitally Certify the Completed Document
- Allow User to Download Document – The participant will be able to download a copy of the file from the viewer. This will be the document as it exists before any fields are filled out, signatures are applied, etc.
- To provide the user with a completed copy of the document after they have finished their task, you can either continue to a View Document task with download enabled or an Email task to send the participant an email with a link to download the document.
- Require Geolocation Information – When the participant arrives at the task, they will be prompted to grant access to their location data. They must allow this access in order to complete the assigned task. If they decline access via their browser controls, they will be notified that they are unable to access the task until they allow location access.
- Accessing Geolocation Information – Collected geolocation coordinates are accessible from multiple locations:
- In the task history on the instance list
- Via the List Instance Tasks API endpoint
- On the digital certification audit page (when enabled)
- Accessing Geolocation Information – Collected geolocation coordinates are accessible from multiple locations:
- Click Upload Document or drag & drop a document – Upload the file (click the Upload Document button to select a file or drop a file onto the box).
- In the Place Fields tab, scan for fields and/or manually place fields on the document.
Note: The Place Fields tab is only available when you select a workflow document and upload a sample document in the Document Settings tab.
To add/place fields on your form:
- Click in the Add your first field dropdown and select a form field type and click on the document to indicate where the field should be placed. A form field of the selected type is added to the document and listed (in order of adding) in the Place Fields tab under the dropdown.
Note: Re-order your fields by clicking the grab handle on the right side and dragging them. Edit a particular field by clicking it. When filling out a document, the order of the fields determines the tabbing order (when you press TAB on the keyboard).-
- Checkbox
- Date
- Initials
- Radio Button Group
- Request File
- Signature
- Text Box
- Click within the form to place the field for the assignee to input a value or sign the document.
- Configure the field – Select the field to configure by clicking on it, either in the document or in the Place Fields tab, and adjust the field settings.
- Click Close Field Settings to return to the Place Fields tab.
- To add more fields, click the Add another field dropdown.
-
- Click in the Add your first field dropdown and select a form field type and click on the document to indicate where the field should be placed. A form field of the selected type is added to the document and listed (in order of adding) in the Place Fields tab under the dropdown.
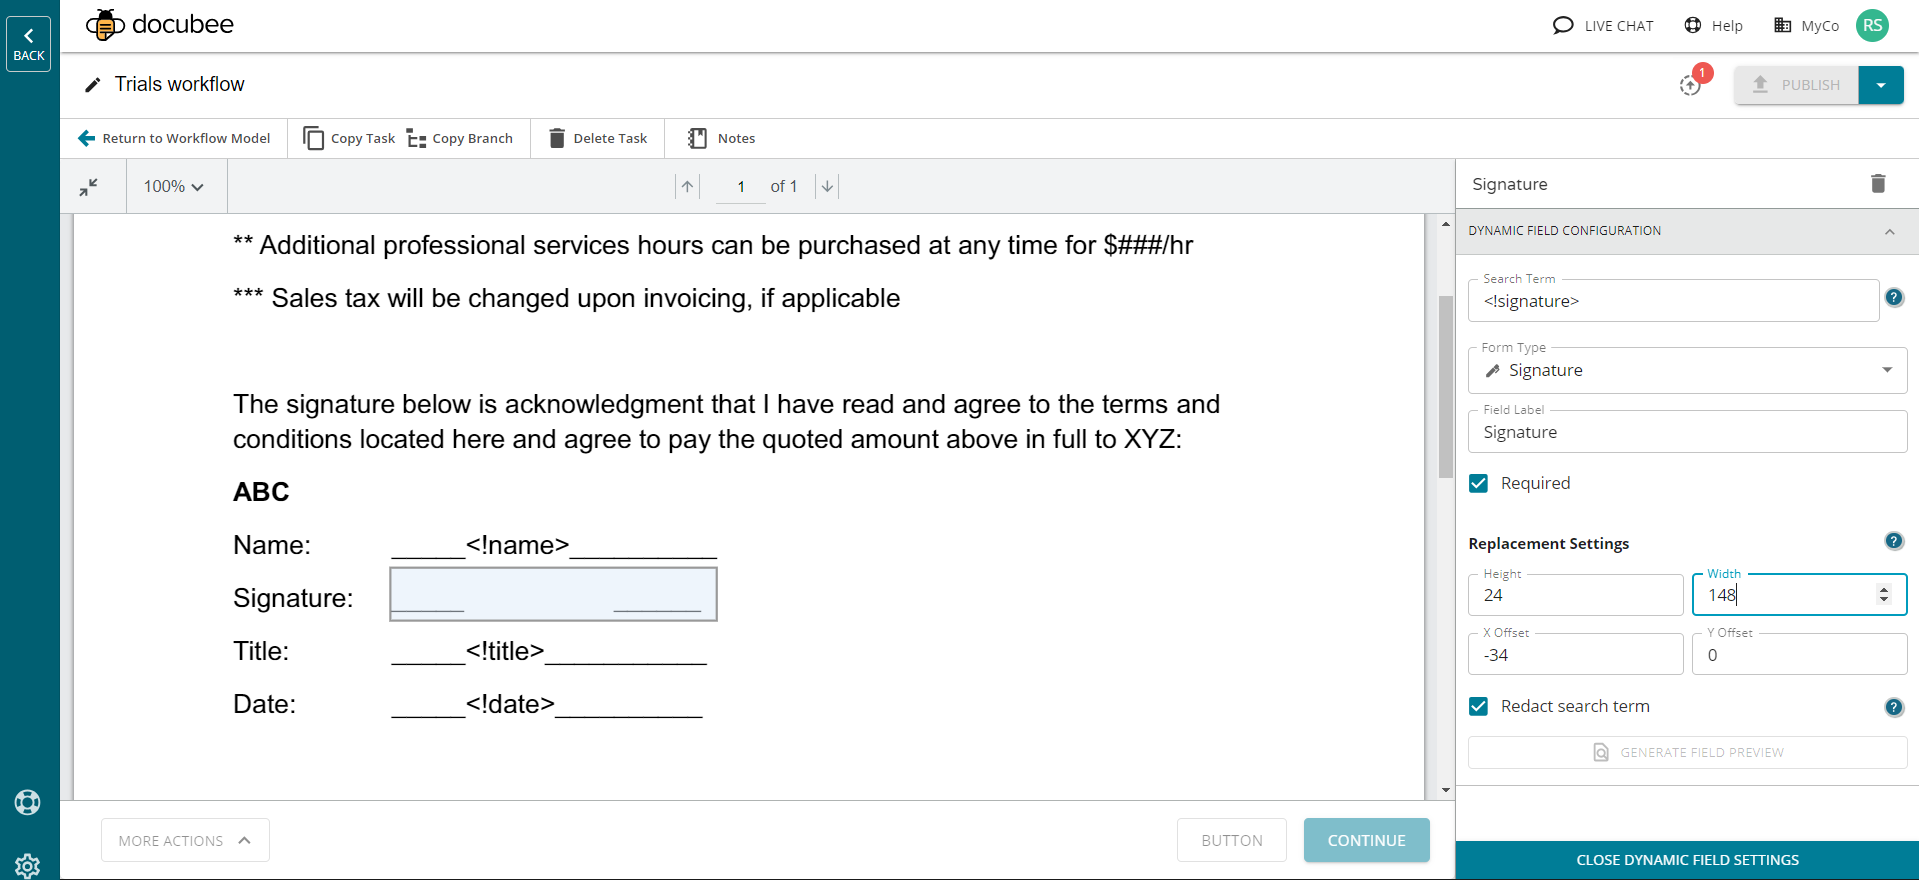
- In the Dynamic Fields tab, specify a search term and a replacement field to easily place fields on long, multi-page documents. At the time of filling and signing, the placeholder text will be replaced with the form field.
Note: The Dynamic Fields tab is only available when you upload a document in the Document Settings tab.Dynamic fields allow you to place fields on the document by replacing specific placeholder text found in the document with different fillable field types at the time of filling and signing. This is useful if you upload a document that may have varying lengths and want fields placed in certain spots.- Search Term – Specify the text to find in the document. This placeholder text will be replaced by the form field.
Note: Some field types, like “Text Box,” may have additional configurable options like a character limit or input mask.- If the search text is found multiple times in the document, the specified field type will be applied for each occurrence. This is useful when applying initials and dates to multiple places within a document.
- Search text is case-sensitive.
- Make sure to make the search term unique so that it cannot match any other text in your document (such as wrapping it in a {{placeholderTags}}).
- Use a unique search term for best results and to avoid it matching any other text in your document. You can make it unique by wrapping it in a {{placeholderTags}}.
- Replacement Settings – Adjust the field placement by entering the value or using the numeric up/down control within the field:
- Use the X Offset to move the field left or right from the initial detection point.
- Use the Y Offset to move the field up or down from the initial detection point.
- Redact Search Term – Select this option to remove occurrences of text matching the search term from the document and replace it with a white rectangle.
- Generate Field Preview – Click this button to scan the sample document for the search term and preview how the fields will appear. You can adjust the field placement. Click Close Dynamic Field Settings to exit the preview mode and the Dynamic Field Configuration tab.
- Search Term – Specify the text to find in the document. This placeholder text will be replaced by the form field.
- In the Action Buttons tab, you can add buttons to the task. An action button will display in the footer and allows the workflow to progress to the next step. It also allows multiple paths (branches) of completion of the workflow. For example, if a request is accepted it would take one path forward and if rejected would take a different path. Watch the Using Conditional Logic video!The button’s behavior can be either of the following for the assignee to use:
- Submit – This button will only be available when all required input is completed and validation has passed. The values will be submitted and saved, and the workflow will continue to the next task.
- Continue without Submitting – This button will always be available. All input will be ignored and will not be submitted while continuing to the next task in the workflow.
- Decline Task – This button declines completing the task. You can configure the workflow’s behavior for when the task is declined:
- Cancel the Workflow – The workflow is canceled when the assignee declines the task.
- Link to Another Task – The workflow builder displays and you can select a connection point (+). When the workflow runs, it will link and continue with the task below the selected connection point.
Note: The task label of the linked task will be included in the Decline Behavior dropdown. - Send Notification Email – Select a participant to receive a custom email notification when the task is declined. You can add additional recipients.
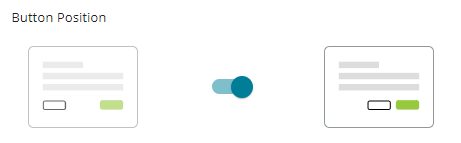
When you add a second button you will have to choose a button position. The document will reflect your choice.
The third button onward is grouped under a More Action dropdown on the lower-left of the document.
Note: Adding a third button overrides the button position setting. - In the Reminders tab, you can add a Task Reminder or Escalation Reminder. See Reminders and Escalations in Workflows for more information.
- After you’ve configured all your fields, at the upper-right corner click <- Return to Workflow Model.
Known Limitations
You cannot have both dynamic fields and placed fields on the same Fill and Sign instance.
Related Information
All About Workflows (Quick Reference)
Prepare Document (Workflows)
Field Sync
Using Conditional Logic (Video)
Additional Resources
Need more help getting set up? Contact us for assistance from our customer support team or register for Office Hours.