


View our Pricing & Plans for a detailed list and comparison of features available in each plan.
You can add different types of tasks to your workflow to suit your specifications. We have conveniently categorized the tasks in our workflow builder. See Create a Workflow for more information on creating a workflow.
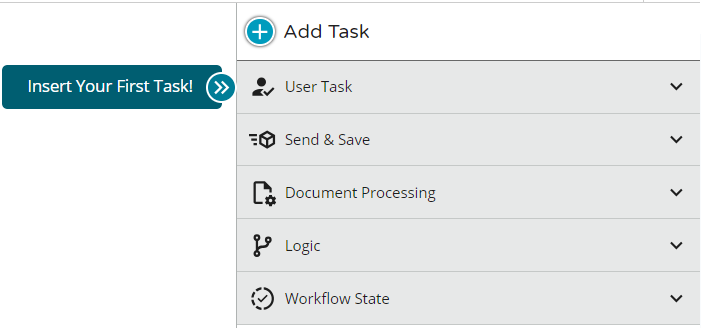
Workflow tasks are categorized into the following types:
We strongly recommend that your first task be a web form user task. This task gathers basic information from the participant, like names and email addresses, for the roles you will need later in the process. Name all your tasks appropriately to identify its purpose.
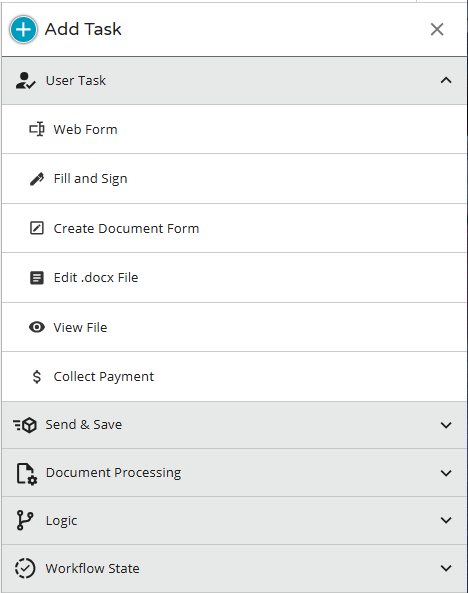
User Tasks
User tasks are for participants to fill in, edit, or view documents when the workflow is run.
Reminders Tab
Note: Task and escalations reminders are available in all user tasks except a web form that starts a workflow.
A reminder adds a branch to the user task and allows a participant to perform some action after the set amount of time has expired. See Reminders and Escalations in Workflow for more information.
Web Form
Add a web form to your workflow and add fields on it. When the workflow is run, the participant can fill the fields yielding initial input, such as name and email address, to be used in other tasks of the workflow. See Create a Web Form for more information.
Fill and Sign
Upload a document or select a workflow document from the dropdown that was previously uploaded in another step. When the workflow is run, it can be filled and signed. You can add fields on it for signature, date, etc. The system securely embeds input data into the document with full legal compliance e-signatures. See Fill and Sign Task for more information.
Create Document Form
This task block is made up of a pair of tandem tasks: Create Document Form (parent task that references a document) and Fill Document Form (child task that assigns a participant). You can insert other tasks in between as needed. See Create Document Form for more information.
Edit .docx File
Provide a .docx file for participants to view, suggest changes, or edit (based on permissions) in a running workflow. You can assign multiple participants to collaborate on editing a .docx file in a workflow and assign them different permissions. See Edit .docx File for more information.
View File
Reference a previously uploaded document (obtained from another task in the workflow) for a participant to view when the workflow is run. See View File for more information.
Collect Payment
Use the Collect Payment task to register and pay for events, make donations and purchases, and more.
Send & Save Tasks
Send and save tasks allow communication with participants and exporting documents and data.
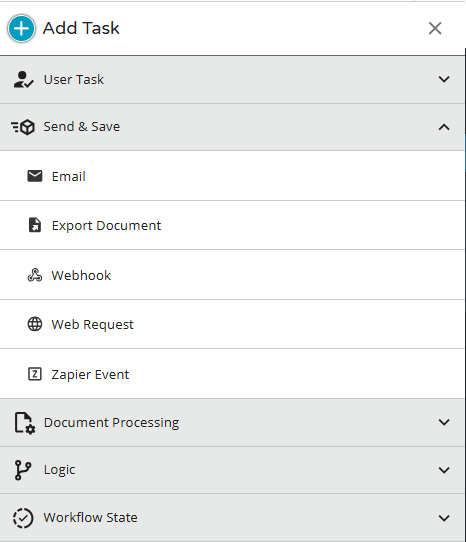
Sends email notifications to participants informing them of a task to complete or the status of a task. See Add Email Notifications in a Workflow for more information.
Export Document
Exports a document and data to an account in any of the supported systems. See Export Document for more information.
Webhook
When the workflow is running, webhooks collect field information and send the field values to a URL for integration to other applications/systems. This triggers an event in the other system by making HTTP requests to that system.
Use webhooks to keep your tools up to date as your workflow progresses or on completion of the workflow you can trigger an event in other systems. See How to Use Webhooks for more information.
Web Request
The Web Request task allows you to send an HTTP request to an external service, receive a response from that service, and then dynamically map/format the response data to the workflow property names for use in subsequent tasks. See Web Request for more information.
Zapier Event
Configure Zapier to use the occurrence of certain events in their solution as triggers to start instances of your Docubee workflow. See Zapier Integration with Docubee for more information.
Document Processing Tasks
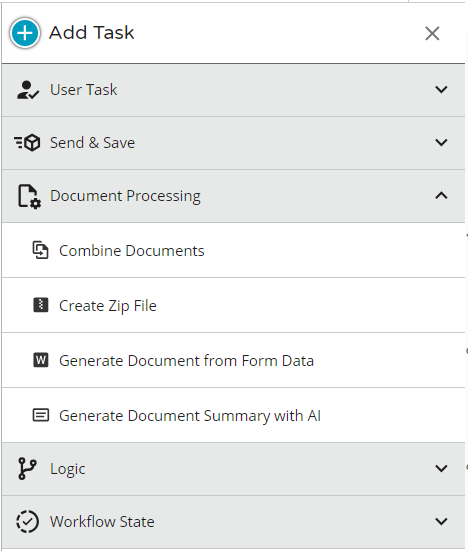
Combine Documents
Workflows can be built to use conditional logic to combine documents. You can either use documents added from previous tasks in a workflow or you can upload a document. See Combine Documents for more information.
Create Zip File
This task combines multiple documents from your workflow into a single .zip archive. After the Zip file is created, you can send it via email or an Export Document (Send & Save) task, as well as access it from the Docubee dashboard. See Create ZIP File for more information.
Generate Document from Form Data
When the workflow is run, it generates documents using data collected in its previous steps. After the documents are generated, it can be routed to other workflow tasks for further edits, approval, and/or signature.
See Generate Document from Form Data for more information.
Generate Document Summary with AI
When the workflow is run, it generates a document summary using AI that you can display or use in the workflow.
Opt for AI generated summaries for Quick Sign emails to give signers an overview of what the document they’re signing contains before opening it. When configuring emails, the Generate Document Summary button is available to generate the summary of the email. You can modify the generated summary to your preferences.
To configure this task:
- Click on the task.
- In the Input Document tab, choose the document to summarize.
- In the Summary Result tab:
- Enter a summary property name. You can use this to reference your document summary in later steps.
- Enter a default answer. This is returned if the document can’t be analyzed.
Logic Tasks
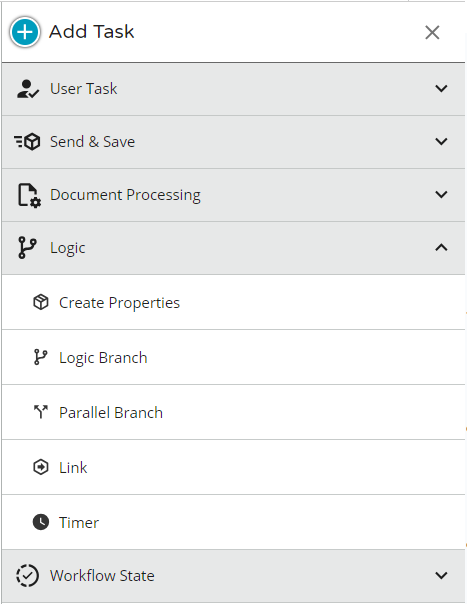
Create Properties
The Create Properties task is for creating properties for use in downstream tasks.
See Create Properties for more information.
Logic Branch
Logic Branches use conditional logic to follow a certain path in the workflow based on the rules specified.
For example, if a purchase over $10,000 requires additional approval, you can use a Logic Branch to build out your normal and large value purchase paths. Watch the Using Conditional Logic video!
To configure this task:
- Click on the task.
- In the right sidebar, click on a branch to open the Edit Logic Branch editor.
- Define the property (Originator Email or Originator Name), condition, and value.
Note: The default branch:
- will be followed if no other conditions are met.
- will cause the workflow to end if you have not customized it to your preference.
- cannot be deleted.
Parallel Branch
A Parallel Branch allows a workflow to follow multiple paths simultaneously. The two (or more) paths operate independently of each other.
For example, when a customer application can be started right away but you still need to collect some supporting documentation from them. In this case, you can use a Parallel Branch to both ask the customer for their additional evidence and start the application internally.
If one of the branches encounters an interrupted task, then only the branch containing the interrupted task is suspended while any other parallel branches will continue to execute.
See Create Branches in a Workflow and Suspend & Resume Feature for more information.
If one of the branches reaches a Complete Workflow task or all of its tasks are completed, then all branches are completed and the instance is moved to the Complete tab of the workflow instance list (Workflow section).
Link
A Link task must be a terminal task on a branch, like a Complete Workflow or Cancel Workflow task. While the latter tasks end the workflow, the Link task allows you to point the workflow execution to another branch. This can be useful for back buttons or reusing business logic. Link tasks cannot have another task following it. See Link for more information.
Timer
Add timers to the workflows. Timers allow delays in a downstream process in the workflow for a set duration of time (minutes, hours, days, or months) or until a specified date. See Timer for more information.
Note: Any timer that is set to the date in the past will proceed to the next task immediately.
Workflow State Tasks
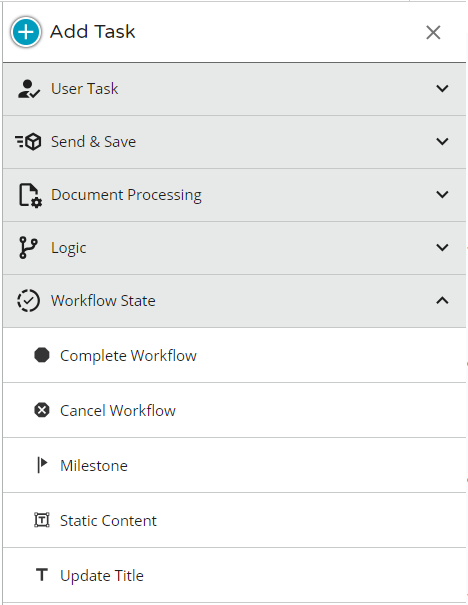
Complete Workflow
Complete a workflow that takes a particular path on a branch. It must be the terminal node task on a branch.
Note: This task can only be added at the end of a branch, as an ending/terminal node.
When a workflow reaches the complete workflow task:
- It terminates the workflow and tasks will no longer be available to participants.
- On the dashboard, the workflow is transitioned to the complete state. This task terminates the execution of the workflow.
See Complete Workflow for more information.
Cancel Workflow
Cancel a workflow that takes a particular path on a branch. It must be a terminal node task.
Note: This task can only be added at the end of a branch, as an ending/terminal node.
When a workflow reaches the cancel workflow task:
- It cancels the workflow and tasks will no longer be available to participants.
- On the dashboard, the workflow is transitioned to the cancel state.
See Cancel Workflow for more information.
Milestone
Set milestones to mark important points of progress in a workflow. They are useful for tracking achievements during workflow execution.
Milestones are visible in the workflow Instance List’s History tab.
Static Content
Display static informational content that requires no action from a participant.
The Static Content task allows the workflow to continue for other tasks while letting you add custom messaging to individual participants who have completed all of their assigned tasks. Example uses include:
- Informing participants that required steps are complete.
- Informing about the next steps to be taken by the organization.
- Custom thank you messaging.
See Static Content for more information.
Update Title
Update the workflow instance title by using data values collected from the radio buttons and dropdowns in previous tasks of the workflow. The old title will be overwritten.
To configure this task:
- Click on the task.
- In the Title Configuration tab, enter the instance title and customize it by choosing to include fields from the dropdown.
- When the workflow is run, data from those specified fields will be used to populate the custom instance title.
The workflow can be built to update the title of a workflow instance at any point when it is running. For example, when starting a workflow, the instance may be named “Tina Wilson – Vaccination Status” and after verification by HR, authorized users can change the title to “Tina Wilson – Verified Vaccination”.
Task Assignee
A task assignee is a participant who will be able to complete an assigned task. Any task that requires a participant to complete it will have a designated assignee identifying the person who will be able to complete this task.
Types of Assignees
Docubee supports four general categories of assignees for tasks:
- Workflow Originator – The person who starts the workflow. Users can start a workflow from the Run button on the dashboard, using a shared link, or scanning a QR code.
Note: This person may or may not be logged in to Docubee when starting the workflow. If they are not logged in to Docubee when starting the workflow, the Workflow Originator will be identified as “anonymous”. - Email Properties – When a web form includes a required email field, that property becomes a valid assignee for all tasks that occur after the web form submission. This allows the workflow to collect the email address of a participant during the process to later assign tasks to them.
- Email Recipients – Emails can be sent either to configured properties (see Email Properties above) or to a static email address entered in the To field on the email task. If the email contains a View Task button, that email address will become a valid assignee for all tasks occurring after the email is sent.
- SMS Recipients – SMS can be sent to configured properties. If the SMS contains a workflow link, that property will become a valid assignee for all tasks occurring after the SMS is sent.
Known Limitations
Need help setting up your workflow or missing a task you need? Contact us or join our weekly office hours for live support.
Related Information
All About Workflows (Quick Reference)
Select and Configure a Document for a Workflow Task
Create a Workflow
Getting Started with the Workflow Builder
Workflow Instance List
Using Conditional Logic (Video)
Download Workflow Documents
Additional Resources
Need more help getting set up? Contact us for assistance from our customer support team or register for Office Hours.

")
